
When you create an ETL process, sometimes the source data is not in the format that you need to load into the database. Below is an example of using a derived column to format the data so it fits into the database the way you require.
Here is what our database structure looks like. The customer name field has both first name and last name in the same field.

If we look at the source data we need to import into our table, the name fields are split out into first and last. We need to combine them during the load so the information fits into our table.

To combine the values goto your SSIS toolbox and drag over the Derived Column component.

Double click the derived column component and it opens the transformation editor.
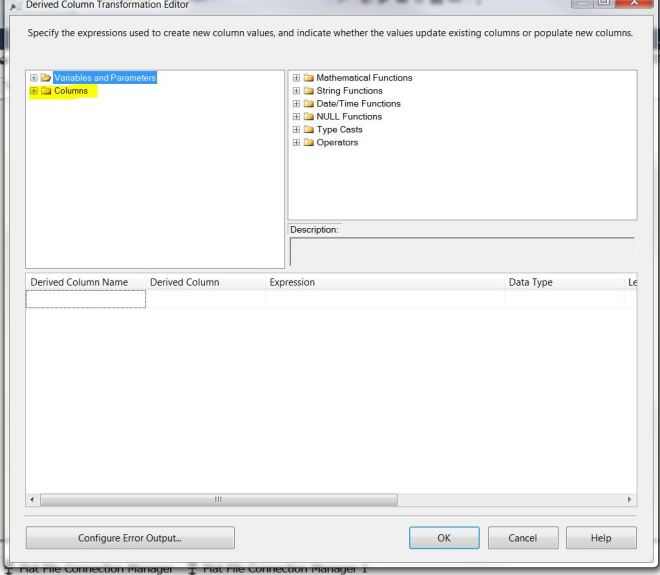
It looks confusing, but we just need to do the following steps. On the left pane, click the columns item, and it shows the columns that are coming over from the csv load process. Then select firstname under columns and drag it into the Expression box in the bottom pane. It is hard to show in pictures, but it will drag.
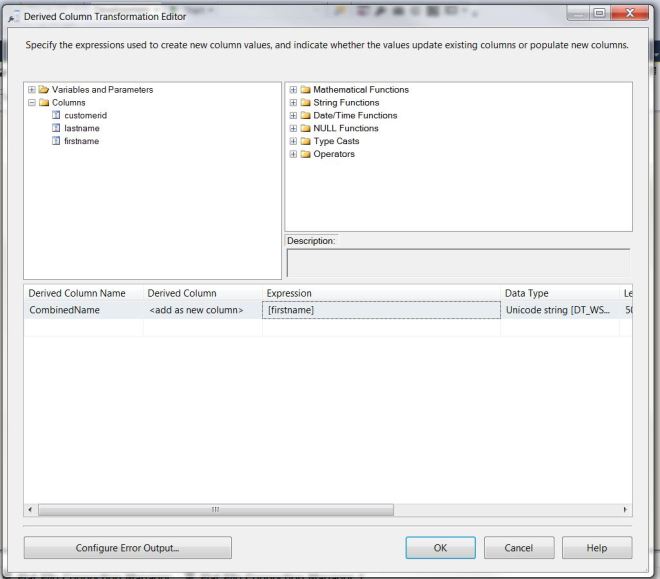
Now we need to concatenate the lastname into the Expression. We can use SQL Server formatting to do this. Below I add a: + ” ” + and then drag in the last name column. This will display the first name with a space and then lastname.

Now we add a destination control using the SSIS toolbox. Double click it and it brings up the editor. Below I selected the table I want the csv file to be loaded to. After that click the Mappings tab in the left pane.

This allows you to map which fields from the import process goto the correct fields in the table of the database. It usually intelligently maps the fields automatically if the field names match in the source file and the destination. The highlighted “ignore” means that field will not be imported because it could not find a match of the names. If we click that box, it will display a dropdown with the derived column that combined the fields from above.
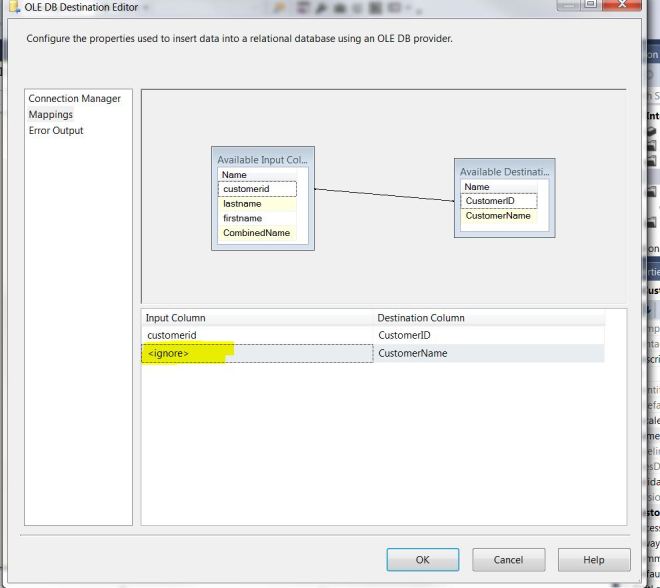
Below we selected the field “CombinedName” that we created above.

Now before running the task, I like to enable the data viewer so you can see what the data will look like before it gets imported. You do that by right clicking the blue line between the derived column task and the destination table and selecting enable data viewer.
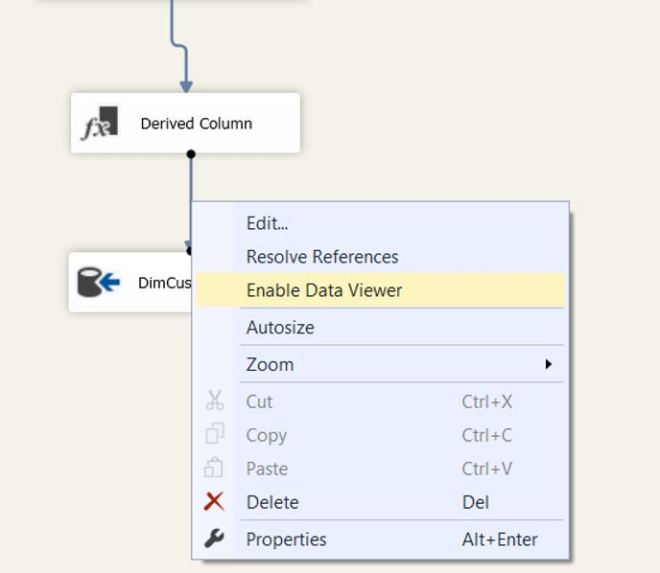
That will put a little magnifying glass on the blue line.

Now when we run the task, a box will pop up showing you the columns of data that will get processed. In yellow below, you can our CustomerName column. It all looks good. Press the green arrow on the left to let the job continue.
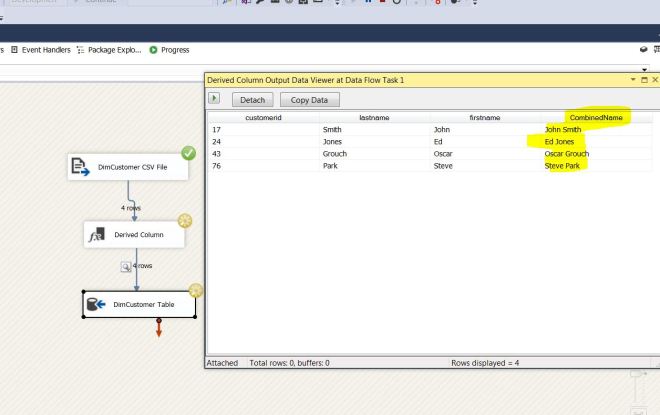
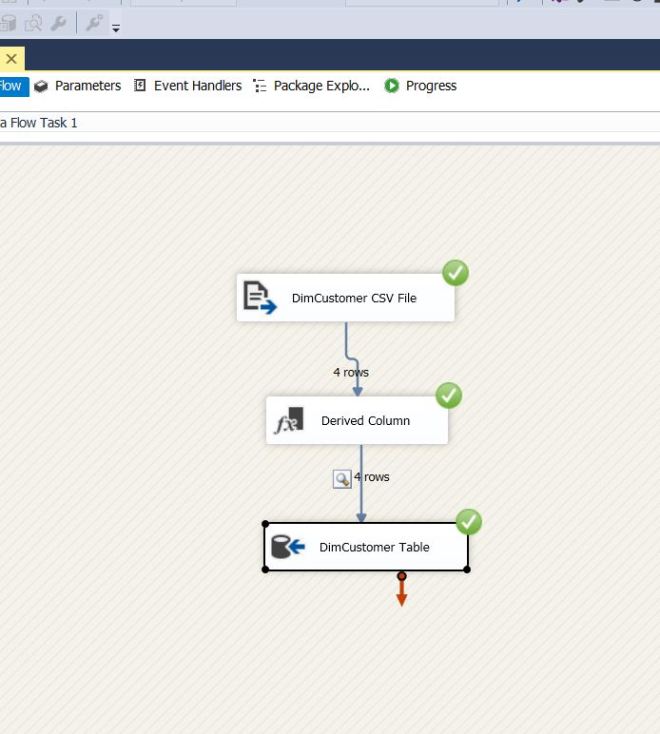
We got all green check marks, so the process did not have any errors.
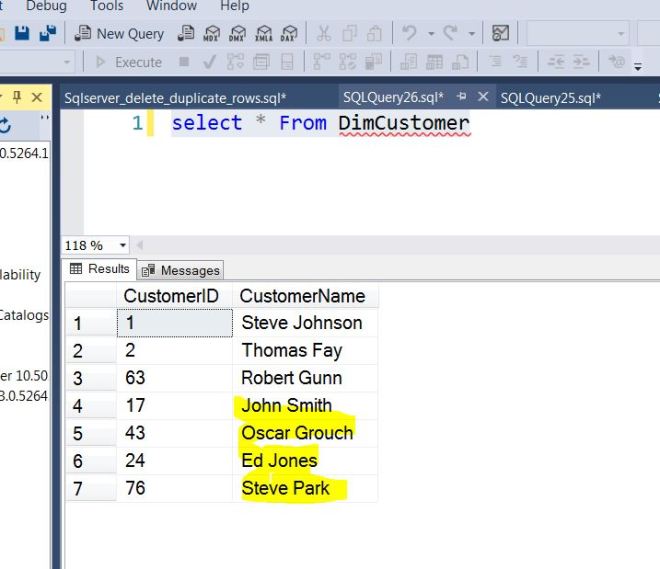
If we look in the database, we can see our data got imported correctly with the first and last names combined.
You can use the Derived Column component to do all kinds of transformations. To read more about it please follow this link: https://docs.microsoft.com/en-us/sql/integration-services/data-flow/transformations/derived-column-transformation?view=sql-server-2017
