
In last weeks posting, we created our first SSIS package which queried a database and saved the information to a file so we could send the information to a user. This week we are going to modify that same package to save the file with the date and time included in the filename.
Lets start by opening the project called etl_sample that we previously created and go to the Data Flow tab. We are going to add a new item from the SSIS Toolbox called Multicast. This allows us to split a process and go to two different processes.
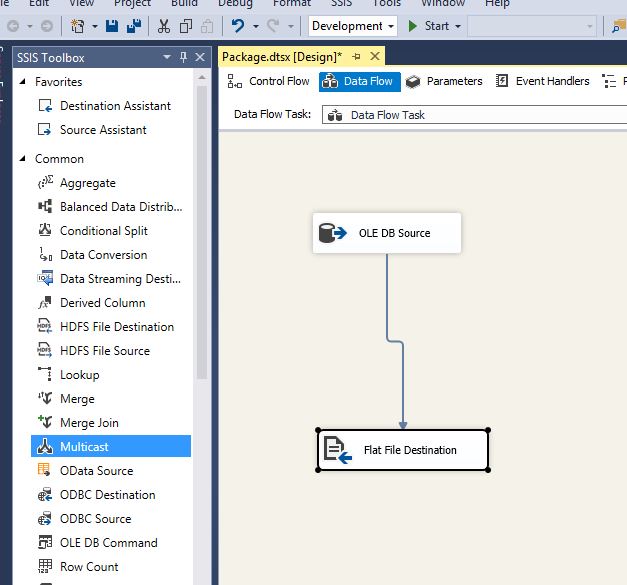
Once you drag it over, connect it between the Ole DB Source and the Flat File destination like below.

Drag over another Flat File Destination from the Toolbox and attach it to the Multicast process. This creates a new destination with a red circle which means we need to do additional setup within it. I will not go through all of the tasks in setting up a new one since we did that last week, but you can reference it here.

I did make the changes below on the destination config screen. I called the file c:\temp\etl_sample_, and I made sure I selected the put column names in the first data row and press Ok.

It then puts us back to the Data Flow tab, and we no longer have a red circle by our new flat file destination.

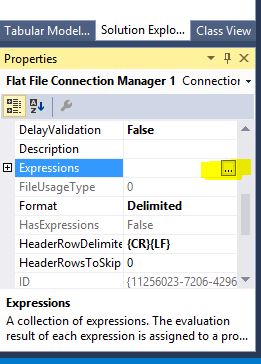
Now we need to right click the Flat file Connection Manager 1 and click Properties.

On the bottom right where the properties are located, scroll down to the expressions property and click the ellipses on the right.
This will bring up the Expressions Editor. Select ConnectionString from the property box, and then click the ellipses in the Expression box.

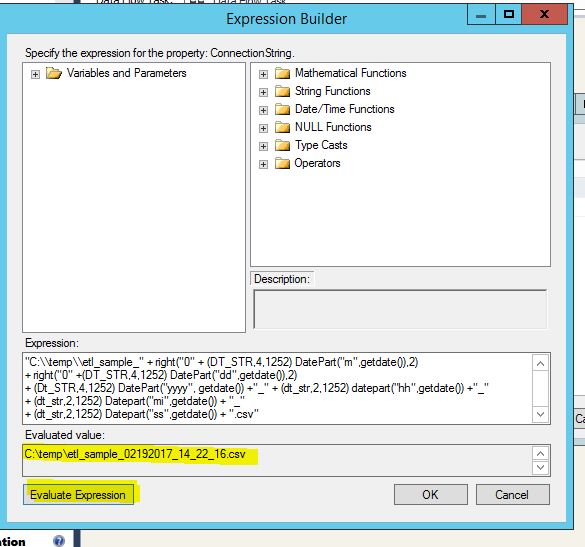
We now need to create an expression to pass through to create the filename in a format that we desire. Basically we are concatenating multiple parts of a date separated by an underscore to create the filename. You can find more information about DATEPART right here, https://www.w3schools.com/sql/func_sqlserver_datepart.asp.
If you click Evaluate Expression at the bottom of the screen, you will know right away if you have the format correct. When I pressed the button, it shows the filename as c:\temp\etl_sample_02192017_14_22_16.csv.
Etl_sample_ we created on the file destination screen. 021920017 is for February 19, 2017. And the 14 is for 2pm, 22 is for minutes and 16 is for seconds: 14:22:16.
Below is the code so you do not have to type it in. Feel free to experiment with other functions. We could have made the extension DAT like the other file, but I called this one CSV to show up easier in the screenshots below. Click Ok and OK again.
“C:\\temp\\etl_sample_” + right(“0” + (DT_STR,4,1252) DatePart(“m”,getdate()),2)
+ right(“0” +(DT_STR,4,1252) DatePart(“dd”,getdate()),2)
+ (Dt_STR,4,1252) DatePart(“yyyy”, getdate()) +”_” + (dt_str,2,1252) datepart(“hh”,getdate()) +”_”
+ (dt_str,2,1252) Datepart(“mi”,getdate()) + “_”
+ (dt_str,2,1252) Datepart(“ss”,getdate()) + “.csv”
Lets run our project and see if it works. All green checkmarks, all good!

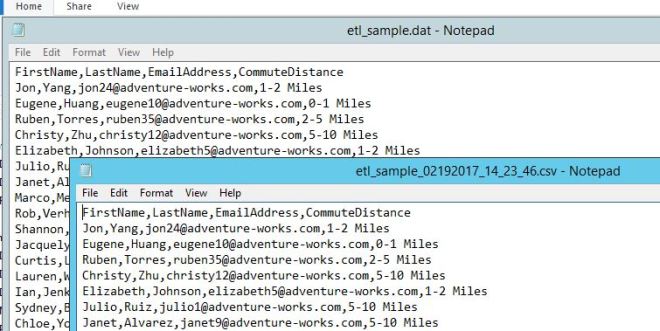
If we look in the destination directory, we see two files got created, etl_sample.dat and etl_sample_02192017_14_23_46.csv.

Opening up the files in Notepad, we see they have the same information in them.
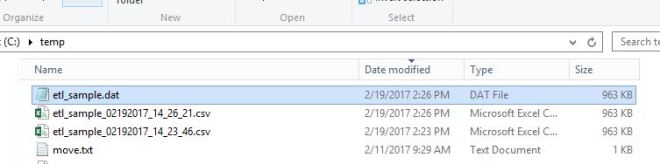
Lets run the SSIS package again and see what happens in the directory. The file with the name etl_sample.dat got overwritten since the name is hardcoded in our first flat file destination which may be bad if we need to go back and see what was in the file on a certain date. Underneath that, we can see there are now two files with names that include the date and time it was run.
We just learned to create a flat file destination with a dynamic name that includes the date and time. This way you can run your processes multiple times in a day without overwriting previous runs, or you can use it as proof that your process actually ran.

Legal, me ajudou muito com seu tutorial.
Obrigado
LikeLike