
What is SSIS? It stands for SQL Server Integration Services which may be used for building high performance data integration and workflow solutions, including extraction, transformation, and loading (ETL) operations for data warehousing. Today I am going to show you a simple solution on how to extract data and save it to a file. This exercise will show some commonly used elements to creating a lot of different solutions.
First thing you have to do is download SQL Server Data tools from Microsoft. This does not come with the base install of SQL Server. As of today, the link to download it is: https://docs.microsoft.com/en-us/sql/ssdt/download-sql-server-data-tools-ssdt
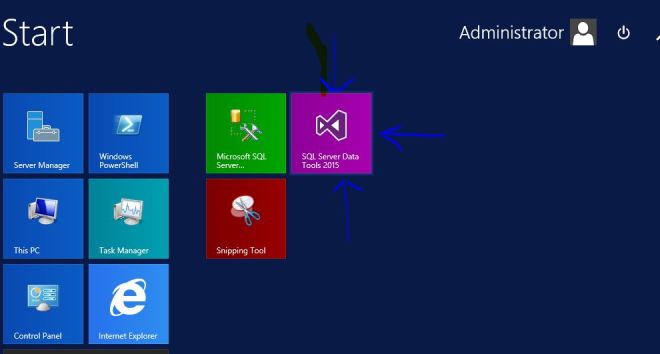
After you download and install, look for the icon below: SQL Server Data Tools 2015
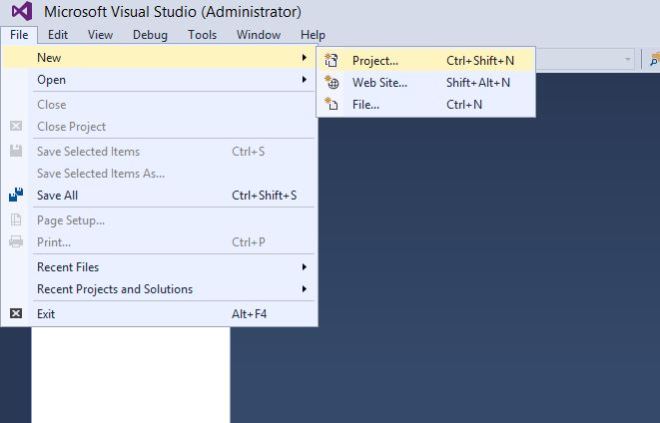
After opening, it uses a special version of Visual Studio, so if you have Visual Studio experience, you will feel right at home. Lets create a new project by going to File->New->Project
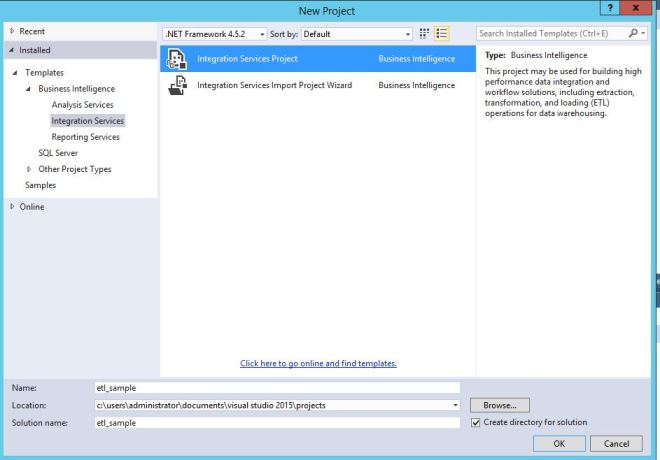
That brings up the screen below. We want to select on the left hand side, Templates->Business Intelligence->Integration Services and then select Integration Services Project in the center of the screen. We will name our project with the original name of “etl_sample”
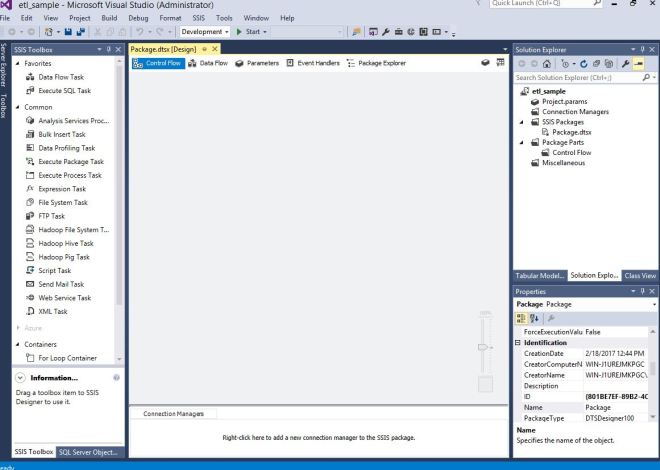
This brings up a blank package.dtsx for us to work on. Along the left hand side, you see the SSIS Toolbox which has a bunch of items that you drag and drop to the center of the screen. On the right hand side, you have Solution related items that are associated to our project.
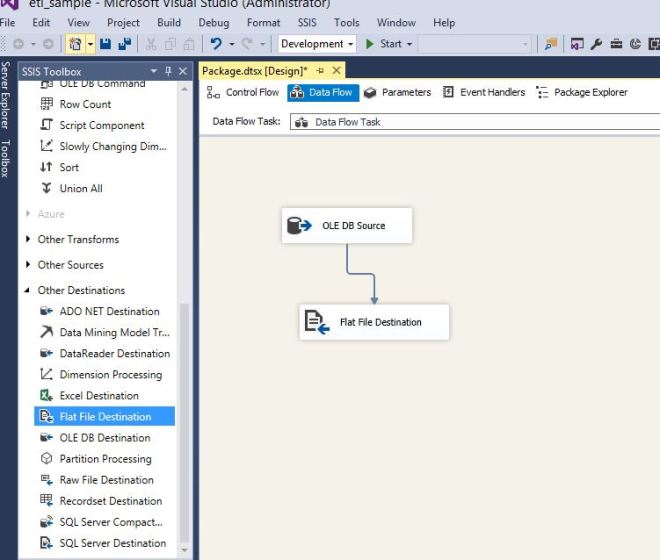
First thing we want to do is click on Data Flow Task in the SSIS Toolbox and drag it over to the center of the screen. A data flow task is usually used to move data from one location to another. Our example is going to take data out of the database and save it to a file, so that is a perfect example. After it is on your screen like below, double click it and it opens the Data Flow screen.

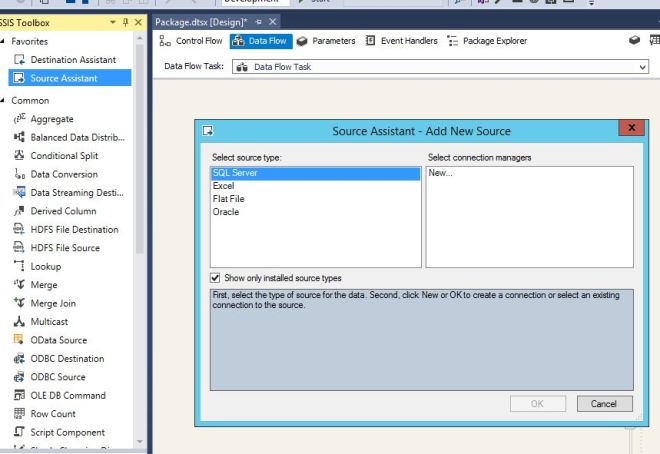
On the Data Flow screen, you have another blank canvas to add items onto. On the left, your Toolbox changes with items that can only been done on the Data Flow screen. We are going to be pulling data from the database, so we use the Source Assistant to setup the connection. Drag the Source Assistant to the center of the screen and wizard pops up to assist you in making your connection. Highlight SQL Server on the left and click New on the right, then click OK.
That brings up the prompts below. Put in your server name where you want to pull the data from. I am running this on the same machine as the database is located, so localhost it is. Select which database you want to pull from, we are going to use AdventureWorksDW2012.
I highly recommend you click the Test Connection button. This will save you a lot of aggravation if your solution does not work and it was just because you did not have the appropriate database rights or you typed in the wrong server name.

We have the appropriate permissions or the correct server and database name.

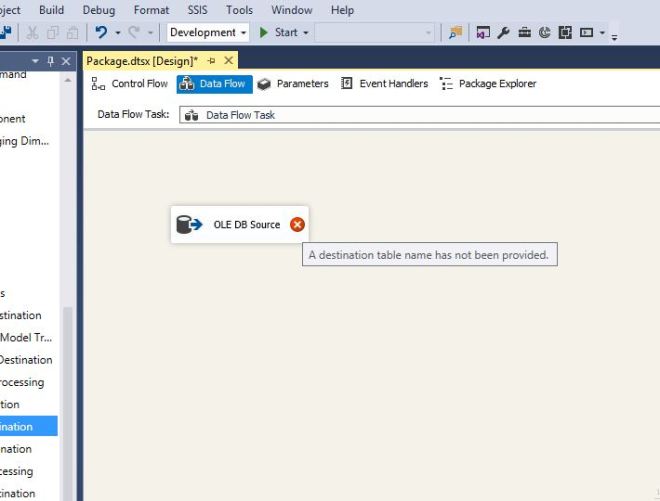
This will add the source for us. But look below, there is a red circle, that indicates there is some kind of issue that we need to correct. This is very handy because if you are trying to figure out why your solution is not working, this will tell you what section it is not happy with and usually gives you a good idea what is wrong. Double click the Ole DB Source below.
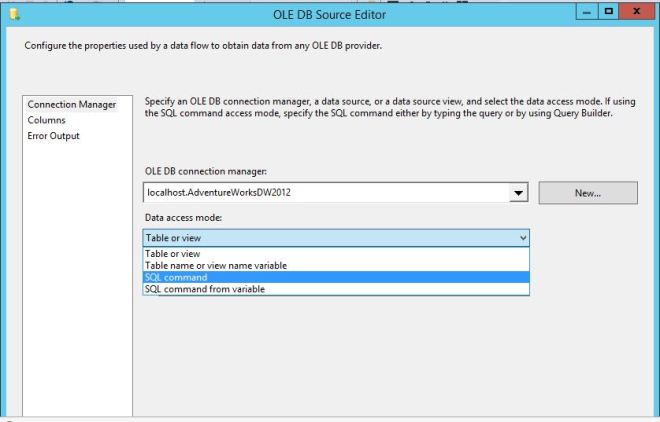
We need to configure what table and data to extract from. From the data access mode, there are several options, but we are going to run a SQL command.
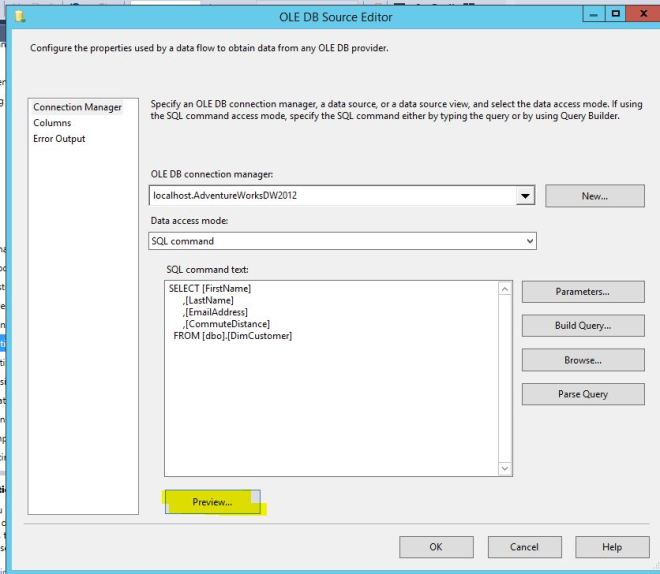
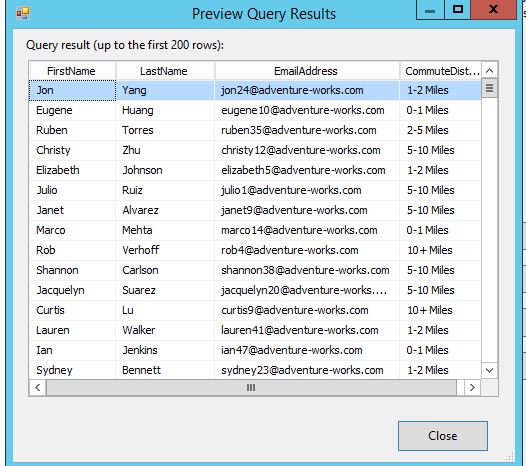
Below is a query that pulls our customers names and email addresses and how far they are from our store. One of our companies Business Analysts needs this information so they can do some analysis. It is a good idea to click the Preview button to make sure the data looks reasonable and is in a good format.
Below is a preview…everything looks good.
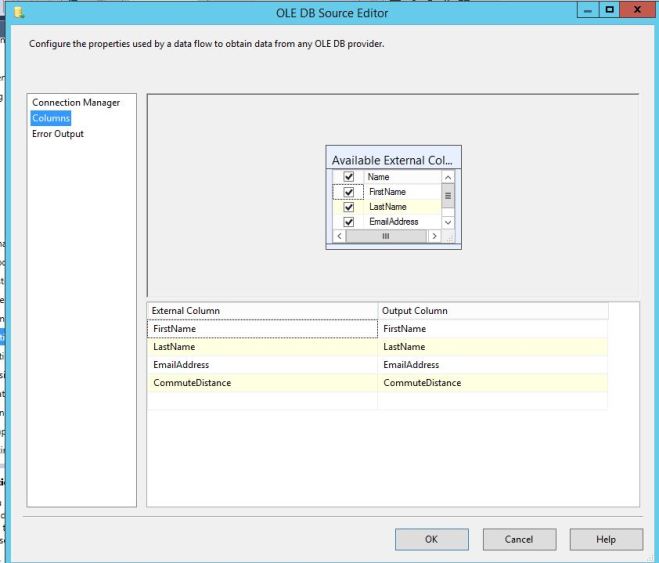
We then click the Columns tab on the left. Here you can change which columns to include or not include without changing the sql command if you need to. We will bring back all of the columns that were in the sql statement. Click Ok.
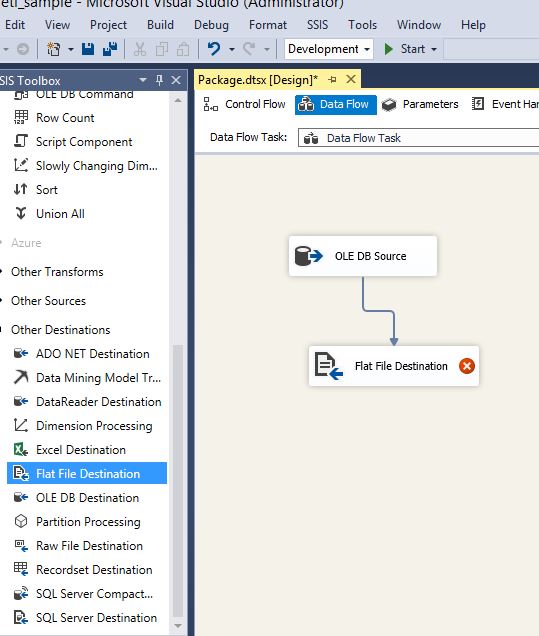
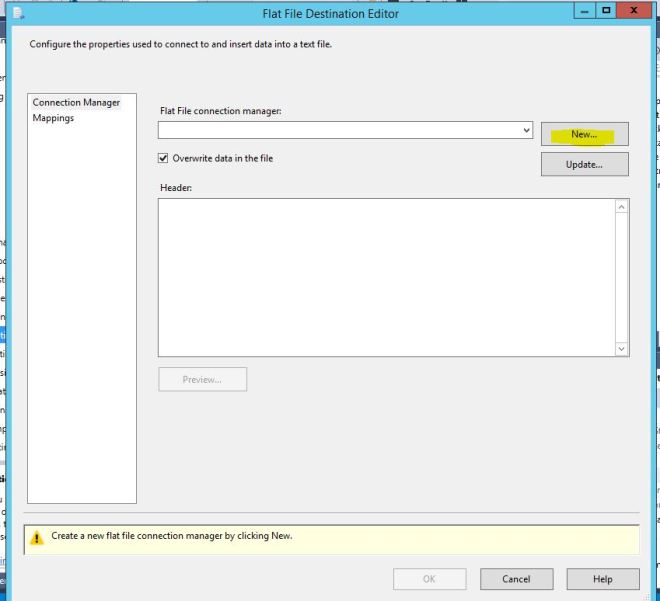
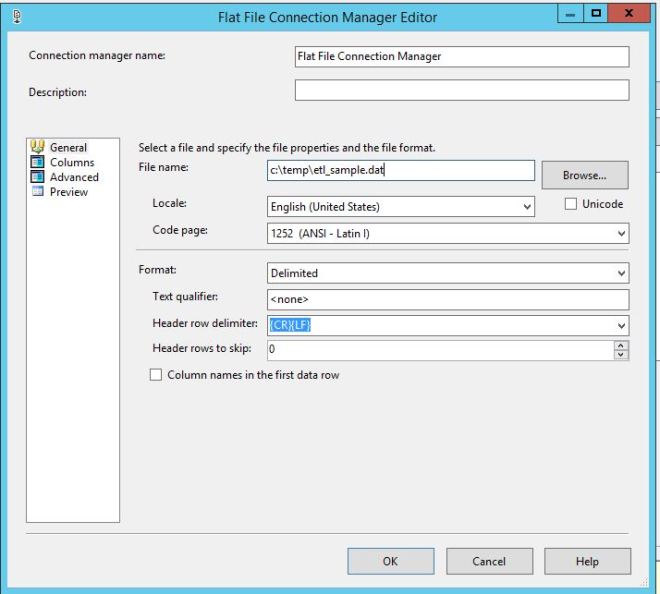
Now we need to connect the Source to our flat file destination. Scroll down in your SSIS Toolbox and drag the Flat File Destination to our canvas and drag the blue arrow and attach it. Now we have another red circle. Double click it and the flat file destination editor will open.
Click new.
And that brings up the formats that we are able to export to. We are going to choose Delimited and press OK.

We need to provide the name and location where we want to save the file. I am going to choose c:\temp\etl_sample.dat. There are additional options you can play with, but we do not need to for this example.
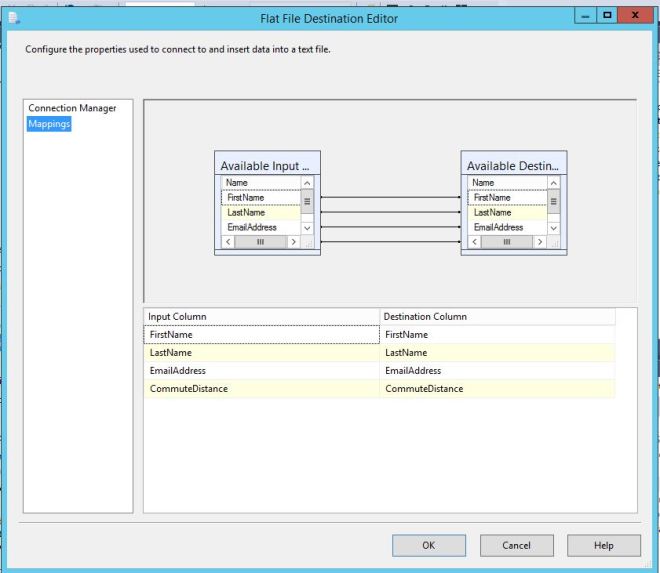
Now click Mappings on the left side to make sure our input columns are mapped to our destination columns. Click OK.
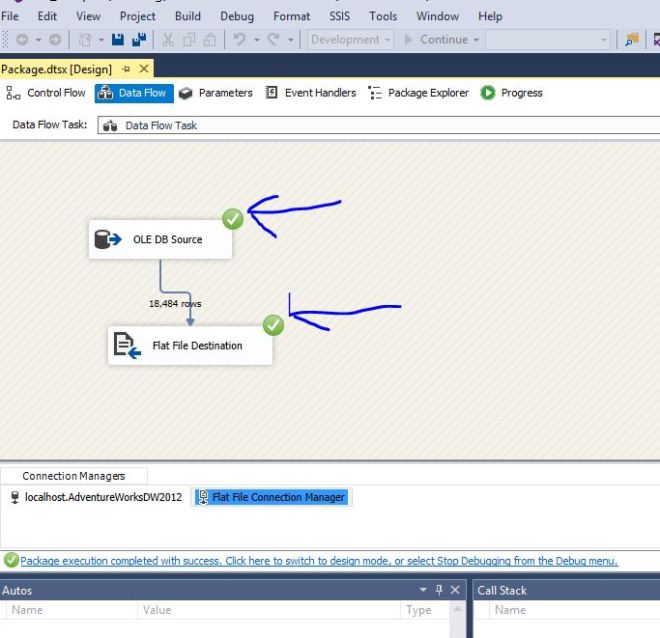
Our red circle is now gone from the Flat File Destination data flow object. It is now time run it and see if it works.
On the top of the screen, click Debug->Start Debugging. This will start up the process and run through all of the steps we created.
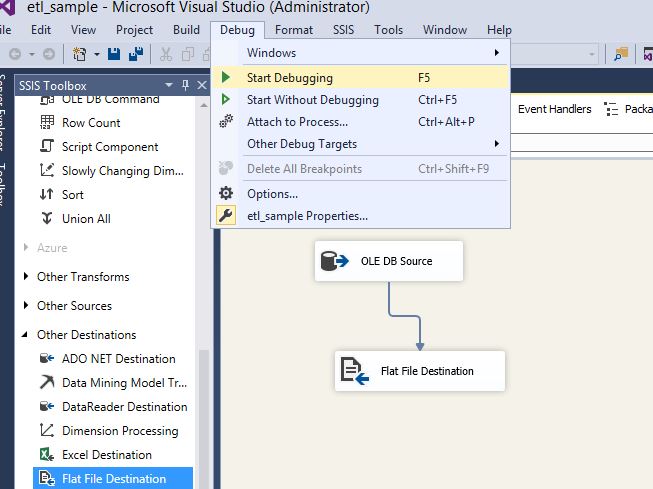
After it runs, if all successful, you will receive green check marks next to each section. Yayyy all green check marks, and our project extracted data from the database and created a comma separated file.
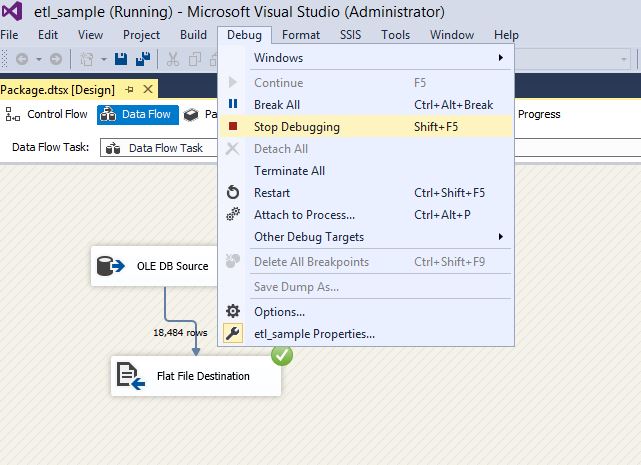
To stop our project, goto Debug->Stop Debugging.
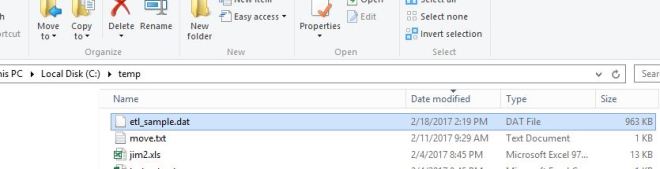
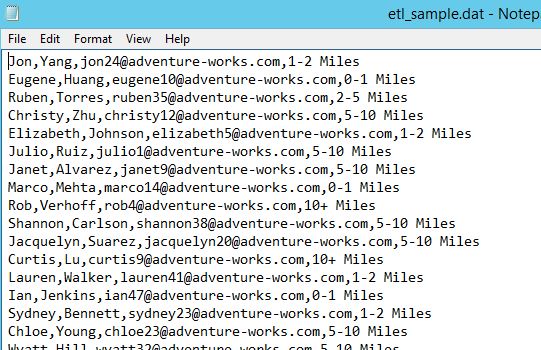
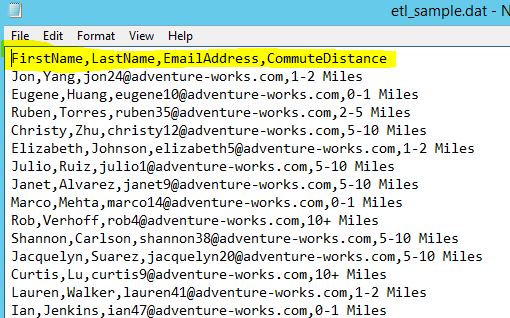
If we look in the directory we specified, we can see a file called etl_sample.dat got created. Lets open it up and see what it looks like.
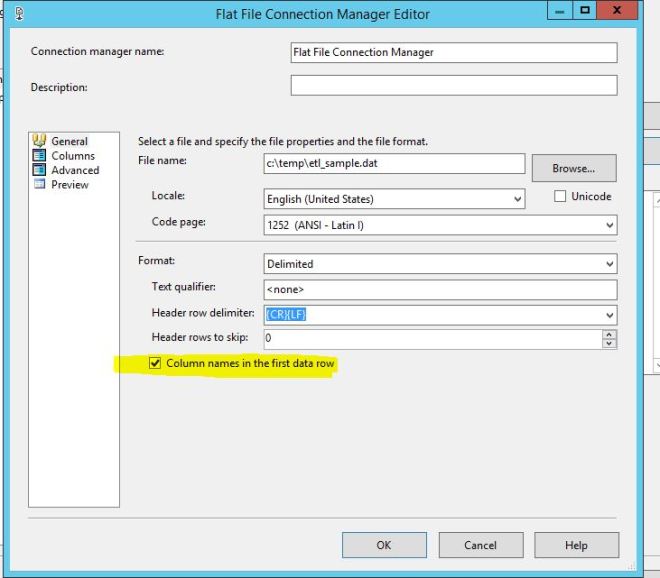
It looks good, but there are no column names to identify what is in each column. We need to go back to the Flat file destination data flow task and modify our settings.
Below we need to check the box to include column names in the first data row. We do that and then rerun the process and a new file overwrites our old file. We open it up and now we can see that the column name is at the top of the file.
Column names in yellow.
SSIS is very powerful and can do all sorts of things and we barely scratched the surface. Next week I will show you how to extract to a filename with the current date and time so you can track your exports.
