
You may have a big file or a large database table that you want to split up into different csv files. Instead of writing multiple queries for the different cases, you can use Conditional Split within SSIS to accomplish this task. There are also a multitude of other scenarios you can use it for.
What is a conditional split? From Microsoft books online:
“The Conditional Split transformation can route data rows to different outputs depending on the content of the data. The implementation of the Conditional Split transformation is similar to a CASE decision structure in a programming language. The transformation evaluates expressions, and based on the results, directs the data row to the specified output. This transformation also provides a default output, so that if a row matches no expression it is directed to the default output.”
Here is our example file. We have one file with everyone in it, but we want to separate the file out by EMPLID numbers. This could also be a database table. We want the even numbers in one file and odds in another.

Using SSIS, create a new control flow task.
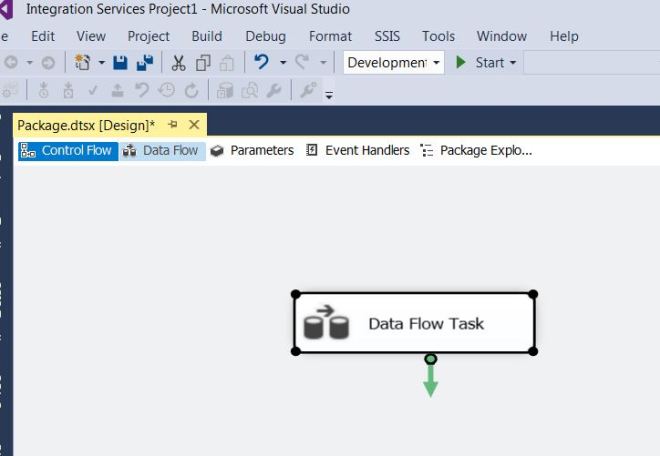
Within that data flow task, drag a source file component over.

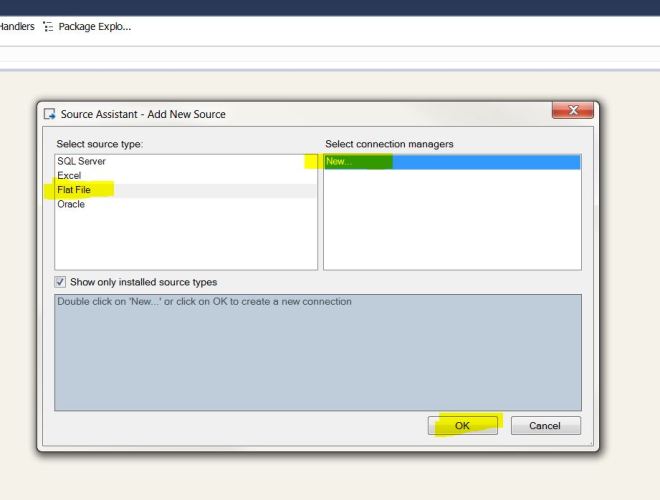
Double click the source file component and create a new flat file source. If you are using a database table or Excel file as your source, you need to set those up correctly.
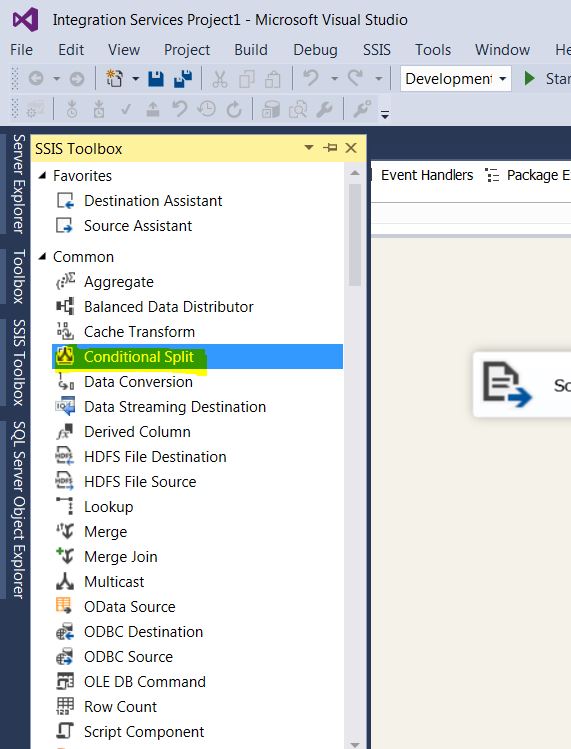
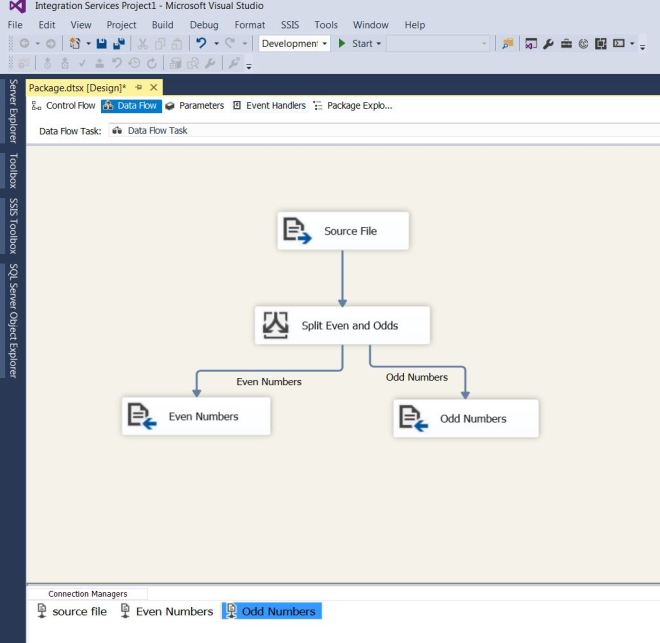
Now that we have a source file setup, we need to drag over the Conditional Split from the toolbox onto the canvas.
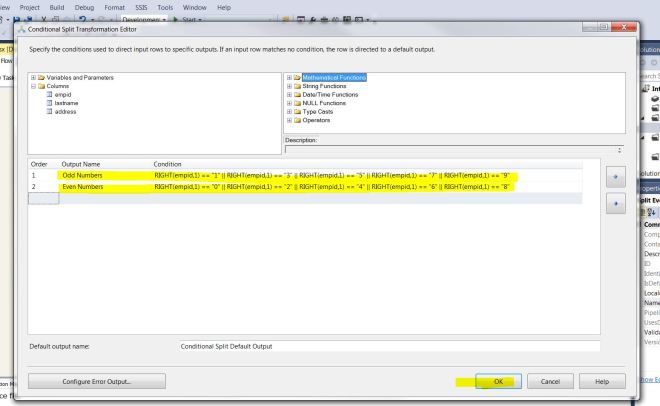
A conditional split allows you to split the source file into different buckets and then pump the output to different tasks. Below I setup two different conditions called Odd Numbers and Even Numbers. Below is the code that was used. Basically, it is looking at the last character and checking to see if it is even or odd.
RIGHT(empid,1) == "1" || RIGHT(empid,1) == "3" || RIGHT(empid,1) == "5" || RIGHT(empid,1) == "7" || RIGHT(empid,1) == "9"

RIGHT(empid,1) == "0" || RIGHT(empid,1) == "2" || RIGHT(empid,1) == "4" || RIGHT(empid,1) == "6" || RIGHT(empid,1) == "8"
Now we can add our destinations that we want the separated data to go to. You could also save the data into a database table or an Excel file.
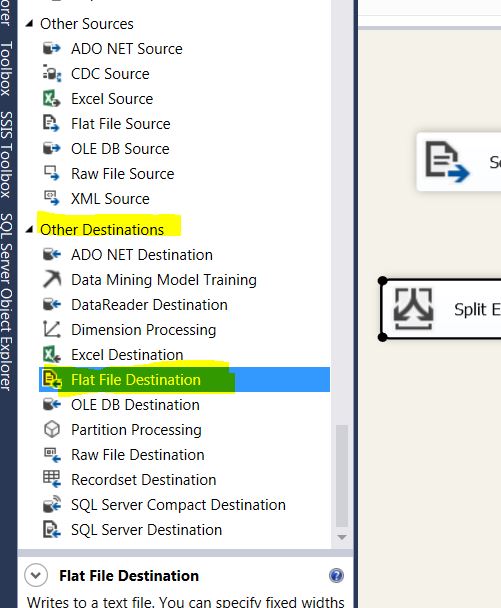
Drag the blue line from the conditional split to the new flat file destination, and it asks you which output you want to supply it. For the first file, pick Even Numbers.

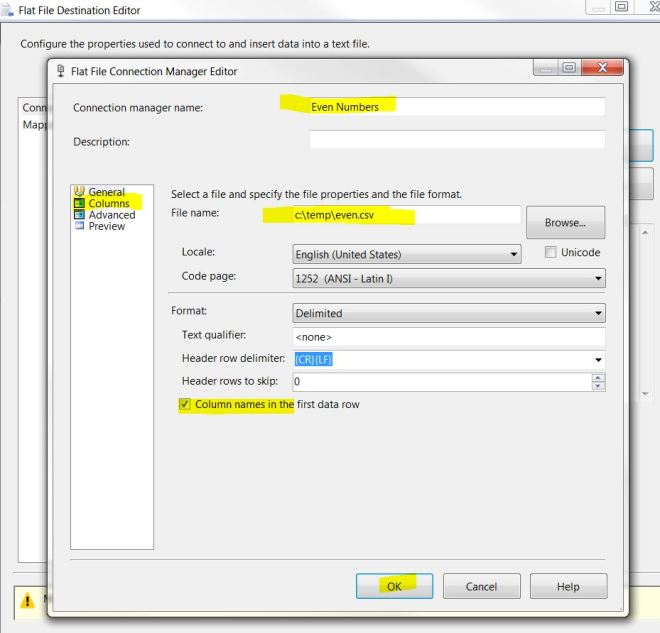
Now, configure your new destination file for delimited data.

Call the filename Even.csv, and put the column names at the top of the file.
Now you need to map the columns.

I am going to keep the same column names.

Do the same thing for the Odd numbers. When you are done, it should look like below.
After running the package, you should get all green check marks.

Looking in the destination directory, I see two files got created: even.csv and odd.csv.

Opening up the files shows that they indeed got separated out by even and odd emplid’s.


Lovely blog youu have here
LikeLike