
You have additional databases that you want to add to your already created Availability Group, what do you do? Follow these directions, and you will have them added in no time.
The business wants you to add another important database to the Availability Group since they now recognize the benefits of Always On.
Below is a screenshot of our current environment. We have two databases, Surveillance and Training in our Prod_Dbs availability group.

First thing we need to do is restore the database on our Primary replica. In this environment, that is Wincomputer1. You can use the restore wizard or by TSQL commands. Below I am restoring the WideWorldImporters database.

If we refresh our databases in SSMS, we can see that the database was restored successfully, but has not been added to the Availability Group.

There are some prerequisites that need to be done on the database before it can be added to the AG. First the database needs to be in Full Recovery Model and we need to make a full and transactional log backup.
First change the Recovery Model to Full.

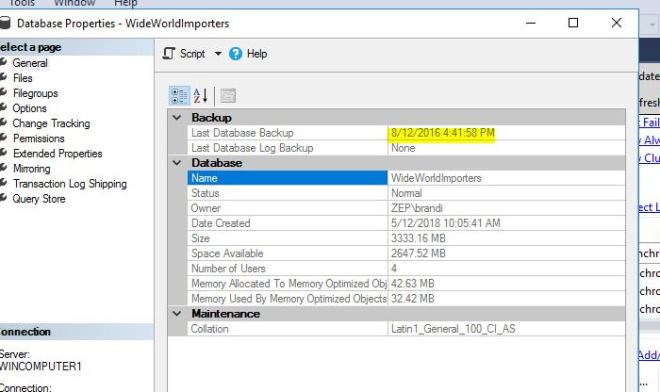
If we check the General tab, we can see that there has not been a recent backup made.
I will now create a full backup of the database.
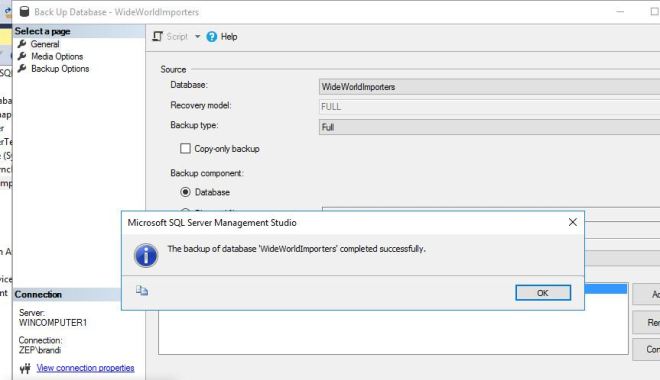
And a transaction log backup.

We can check the General properties page again, and see that backups have been made.

Now we can add the database to the Availability Group. In SSMS, right click Availability Databases and choose Add Database.

This starts the Add Database wizard.

First it wants to know which database to add. This shows the databases on the server, and which ones have the ability to be joined. WideWorldImporters meets the prerequisites since we created our backups.

Now it wants us to sign in to our secondary replicas. You can either press the connect button next to each server if you want to use a different login, or click the connect all button at the bottom to login as the current user.

After you login to each server it will look like this.

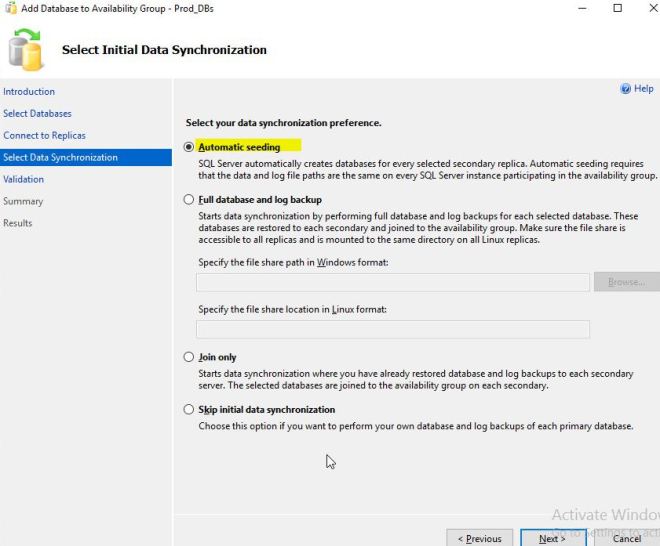
Now it wants us to choose an initial data synchronization preference. Since I am using SQL Server 2016 and my directory structure is the same on all servers, I use Automatic Seeding. It makes everything very easy.
It then does a quick validation.

Below is the summary page. You can either click Finish to start or you can click the script button to get the SQL so you can see the commands.

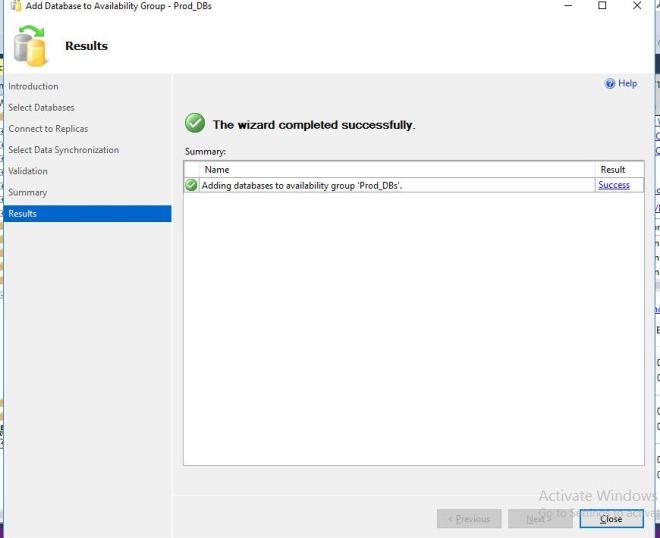
If everything goes well, you will get a completed successfully message.
If we go right to our dashboard, we can see we have some errors and warnings. This is because it is still seeding to the other servers. Nothing to worry about…..yet.

Depending on the size of the database and network speed, this may take a while, but eventually everything will synch up. Below it shows that the WideWorldImporters has been added to the Availability Group. If you still have errors, you will need to start investigating. Click the warning and errors and work through the issues.

If we refresh our SSMS, we can see that under database, WideWorldImporters is now in a Synchronized state. If we look under Availability Databases, WideWorldImporters is showing that it was added as an Availability Database.

That’s it. Now you are able to protect additional databases in your environment.
