
For database high availability, SQL Server Always On Availability Groups (AG) are the gold standard. These were first introduced in SQL Server 2012 and Microsoft has continued to improve and add features to help protect your data with each new version.
This is an Enterprise Edition feature, so it is not inexpensive to roll this out.
Setting this up was a great learning experience for me. I have setup AG’s before, but I have never setup a network or clustering before, so I did learn a lot of new skills.
I could not possibly explain every benefit of Availability Groups, but I highly recommend if you do roll these out, to check out the documentation. https://docs.microsoft.com/en-us/sql/database-engine/availability-groups/windows/overview-of-always-on-availability-groups-sql-server?view=sql-server-2016.
Scenario Background
For our example, I am going to assume you already have servers on a network, Windows Clustering installed, and a cluster already built. Don’t worry I did not have those setup either. Below are the blogs I used to set this up in my environment (thank you fellow bloggers!). Unfortunately, I did not document setting this up in my environment. When I finished I had an Active Directory/domain controller called WINCOMPUTERDC, and 3 database servers called WINCOMPUTER1, WINCOMPUTER2, WINCOMPUTER3. Since I had the servers already built, the entire process took under 2 hours from no network to having an Availability Group created.
Creating a network in your environment
At home, I do not have my VMS on a network, they are just individual machines. I used the directions in this blog and created a network called ZEP on the WINCOMPUTERDC server, it was easy to follow and it worked! A bonus is you will have a network when you are done. https://blogs.technet.microsoft.com/canitpro/2017/02/22/step-by-step-setting-up-active-directory-in-windows-server-2016/
Install Failover Clustering
Next you need to install the failover clustering software and tools on the servers that you want to cluster. I did this on the WINCOMPUTER1-3 servers. These directions are for Server 2012, but everything is the same: https://blogs.msdn.microsoft.com/clustering/2012/04/06/installing-the-failover-cluster-feature-and-tools-in-windows-server-2012/
Configure Failover Clustering
Finally, you need to add the servers to the cluster. I followed this blog and successfully created a cluster named ZEPCLUSTER. https://www.vembu.com/blog/installing-the-failover-cluster-feature-in-windows-server-2016/
Setup Availability Groups
After the above items are setup, we can now setup the Availability Groups.
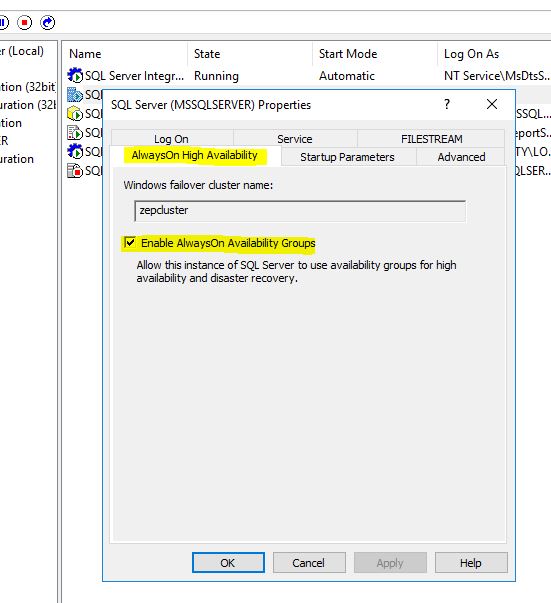
First we need to make some changes in SQL Server Configuration Manager. It will be located somewhere in your Start menu. Look for SQL Server Network Configuration->Protocols and enable TCP/IP.

Then open SQL Server services properties. We need to run the database service as a domain account, so I changed it to a user that has SYSADMIN at the database level.
On the Alwayson High Availability tab, select enable always on availability groups. It will already have our cluster name listed. Click apply, then ok. It will prompt you to restart the service which you should do. Now do these steps on the other servers that are in your cluster. I did the same steps on WINCOMPUTER2 and WINCOMPUTER3.
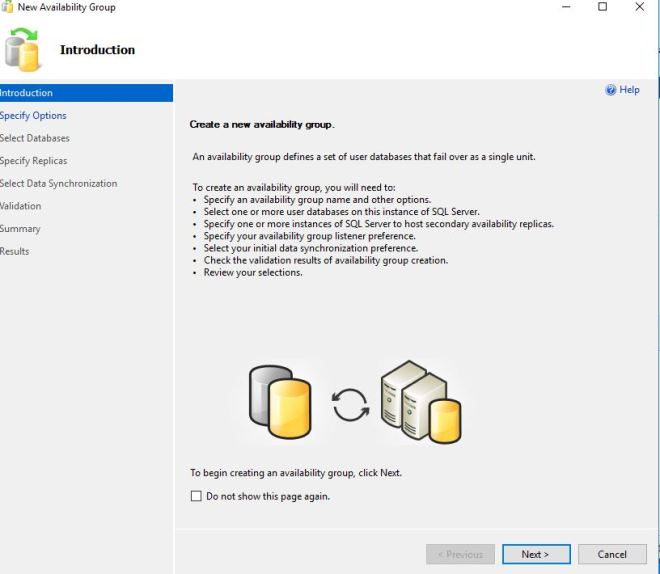
Now in SSMS on your server where the databases currently reside, right click Always On High Availability, and select New Availability Group Wizard. This starts up the wizard. Click Next.
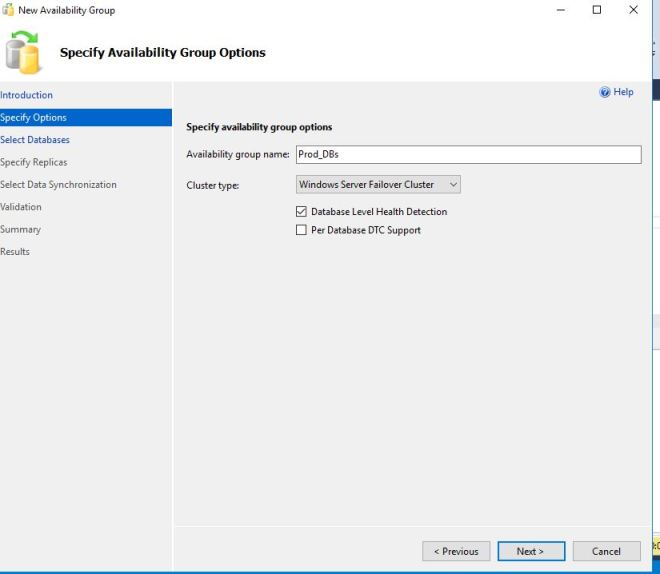
First we need to name our group. I am calling mine Prod_DBs. This allows you to put related databases in their own group (all of the Sales DB’s in their own group, etc.)
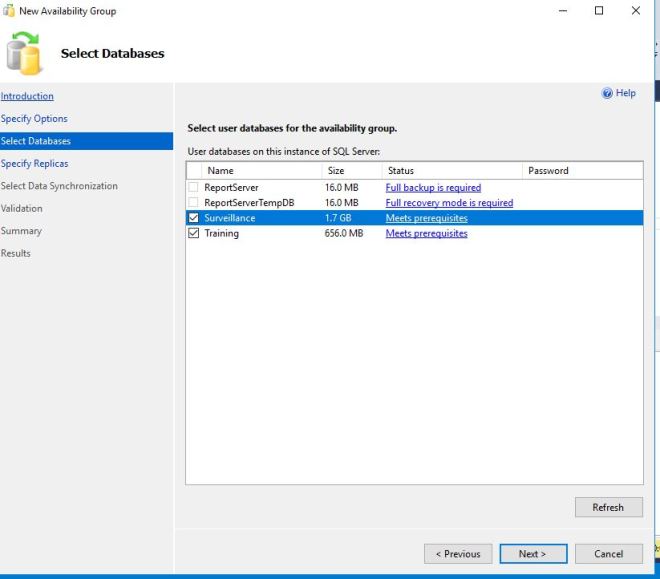
Now we need to pick which databases we want to add to the Availability Group. I am choosing Surveillance and Training. The databases need to be in Full Recovery Model, and a database backup needs to be made beforehand to meet the requirements.
On this screen we need to Add Replicas, which means tell the wizard what servers you want to be included.
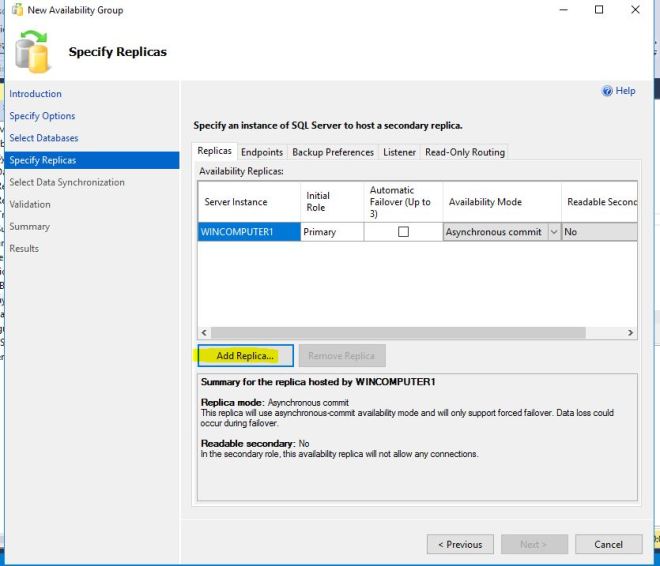
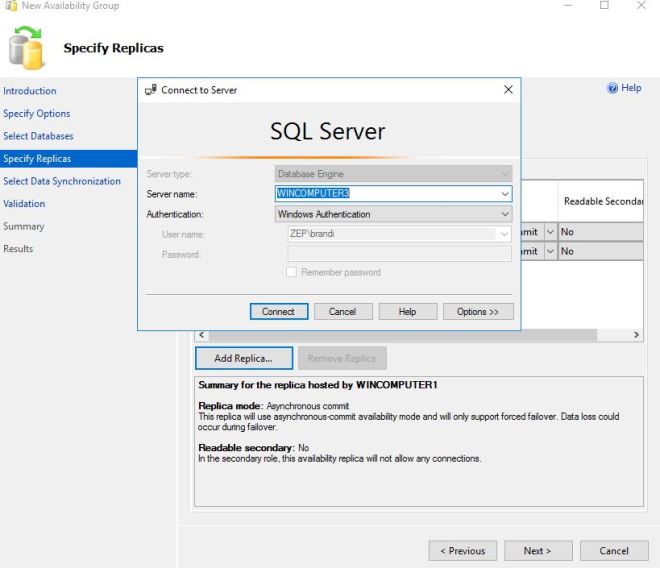
After you press Add Replica, it prompts for a server name and login. I am using the username that the service is running under.

I then add another replica.
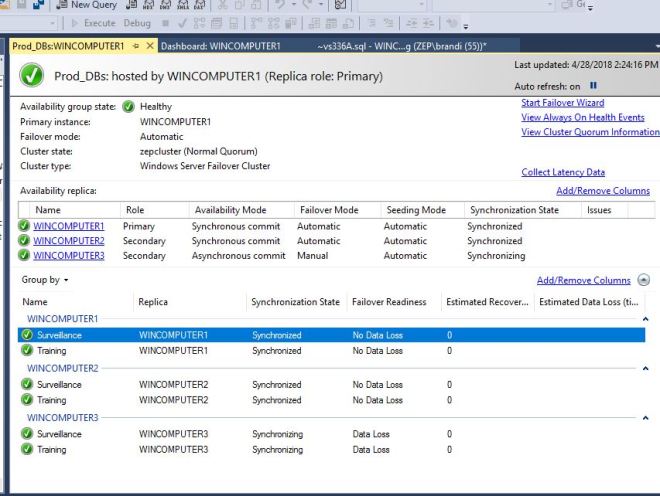
When they are added, your screen will look like below. I chose Synchronous commit for two of the servers, and asynchronous for the third. Synchronous commit will allow us to have close to zero data loss. Our other server is asynchronous, which is our safety server, and it will have a chance of some data loss (depending on your network speeds usually 1-10 seconds, in my production environment).
To read more about the modes, follow this link: https://docs.microsoft.com/en-us/sql/database-engine/availability-groups/windows/overview-of-always-on-availability-groups-sql-server?view=sql-server-2016#AvailabilityModes

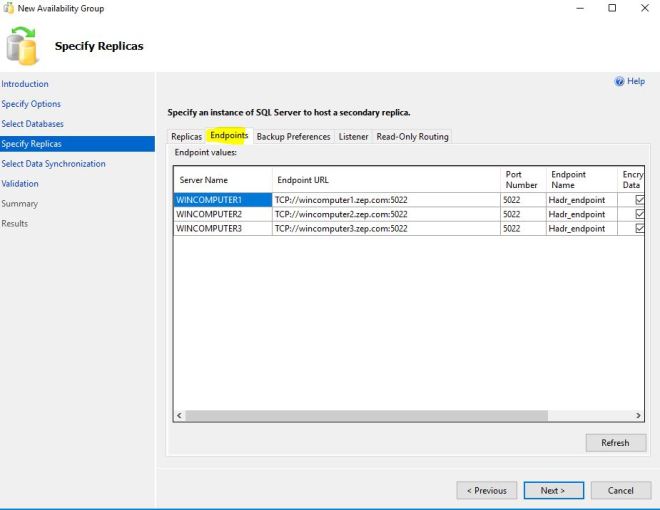
Clicking the Endpoints tab, I did not make any changes on this screen.
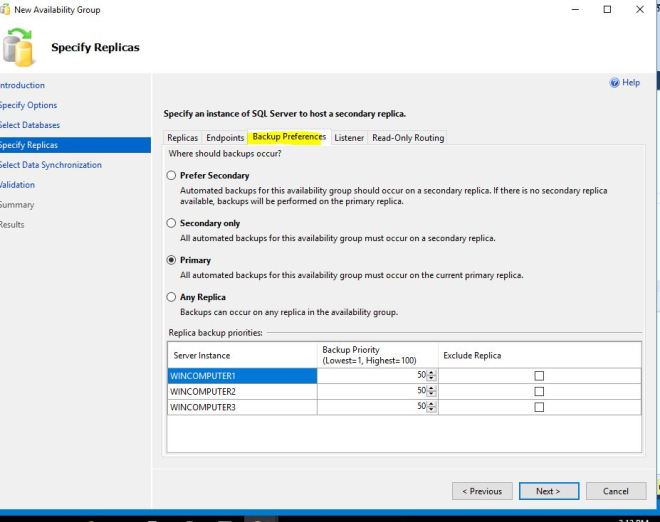
Clicking the Backup Preferences tab, you can choose where backups are made. This is one of the advantages of running an AG, you can offload your Checkdb’s and Backups to run on a secondary without affecting the primary for performance reasons.
After clicking Next, we have a decision on how we are going to populate the other servers in the cluster. Since our directory structure is the same across all servers, I picked Automatic Seeding which is a new feature in 2016.

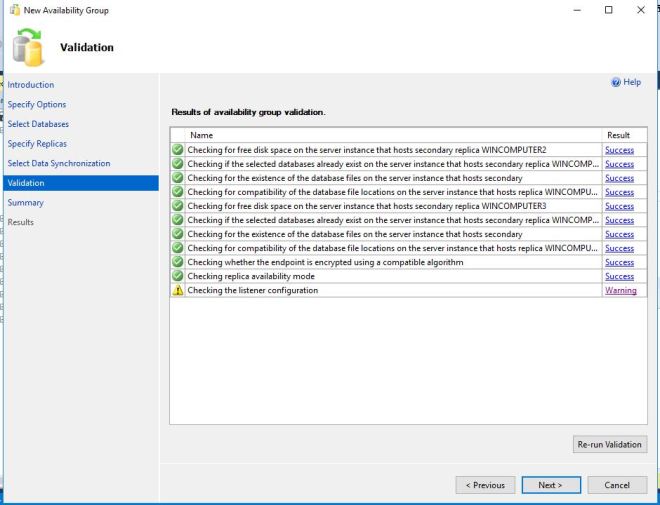
After clicking Next, the wizard runs a validation of our choices. We did not specify a Listener, so it gave us a warning. We will create a Listener in later blog post. In a production environment, you can point your application to the Listener, and it will automatically attach the application to the active primary database. If the databases ever fail over, the Listener will always connect to the active database, so no application connection changes are needed if a server goes down if it is pointed to the Listener.
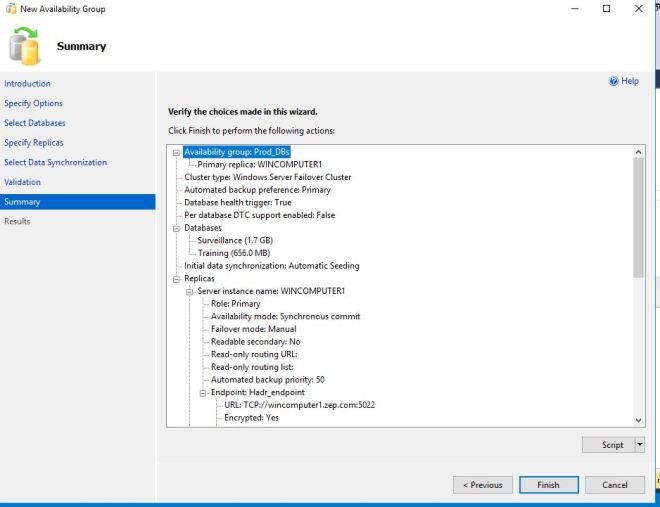
I press next, even though I got the warning to get to the summary screen. Press Finish to complete the setup.
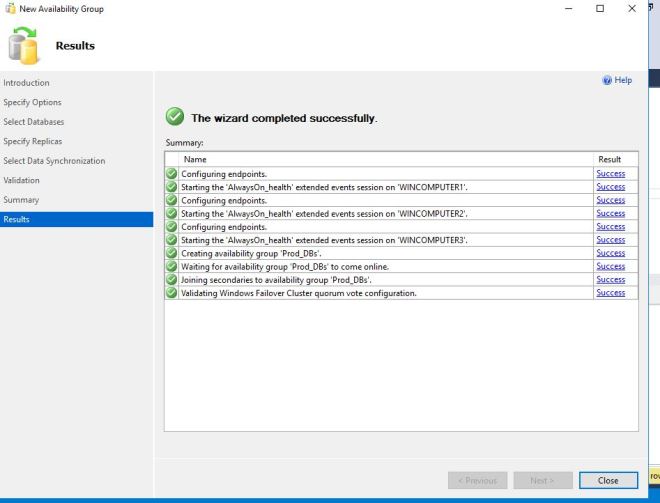
This will run for a few minutes.

If everything goes well, you will get a successful install.
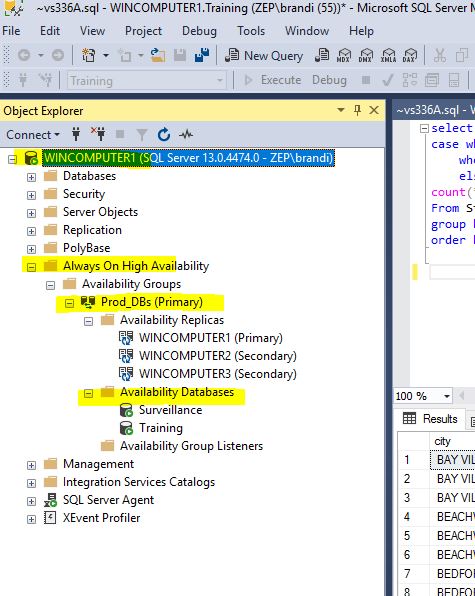
If you open up the Always On High Availability tab in SSMS, you can see all of the new items that got created.
If we right click Always on High Availability and chose Show Dashboard, we get this screen. Click on the Prod DBs link and it will open another screen.
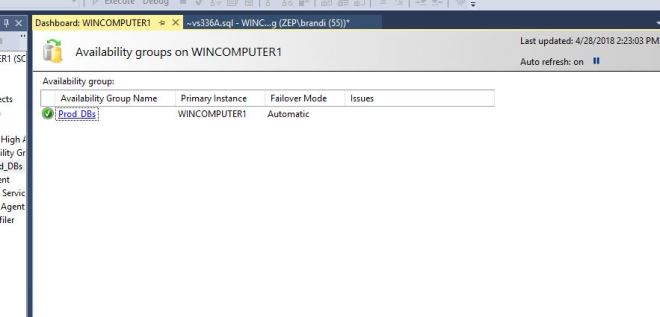
This is the main dashboard and it shows you the health of your Availability Group. We can see at a glance which server is the current primary, what failover mode each server is set for, how long is recovery time, and how much data loss we could expect during a failover. All green is all good.
For more information about the dashboard, this link tells you more: https://docs.microsoft.com/en-us/sql/database-engine/availability-groups/windows/use-the-always-on-dashboard-sql-server-management-studio?view=sql-server-2017
If you login to one of the other servers and look under SSMS->Database, you can see that they are really on the server. You cannot run queries on them because we did not set them up as Readable Secondaries, but during setup that is an option.

Whew! What can we do now that we have this setup? Well now we can patch servers without any downtime by doing rolling failovers so one server is always active. This will be in the next blog post. Also you have now protected your companies data using one of the most advanced features of SQL Server.
