
In a previous article I demonstrated how to create a SSRS report that runs against a SSAS Cube. This time I am going to show you how to create a report with a query that you already have created.
You have this great query that you run and then extract the data and send to all of your co-workers. That is good, but now they want it in a report form so they can run the report themselves without bothering you.

First open SQL Server Data Tools or Visual Studio and create a new project. Under Business Intelligence, select Reporting Services and then select Report Server Project Wizard. The wizard is very handy and can be used approx 80-90% of the time with great success. I named this project Vendors.

After clicking OK, it brings up the Report Wizard greeting. Click Next to continue.

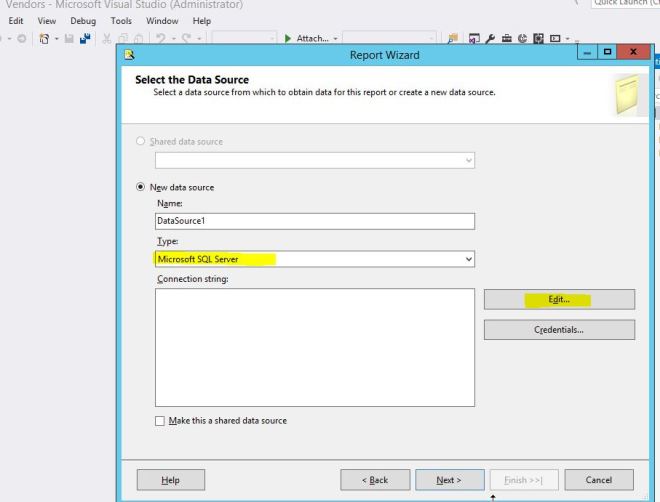
First we need to create a connection to our database that the query will run against. The type will be Microsoft SQL Server, then click edit.
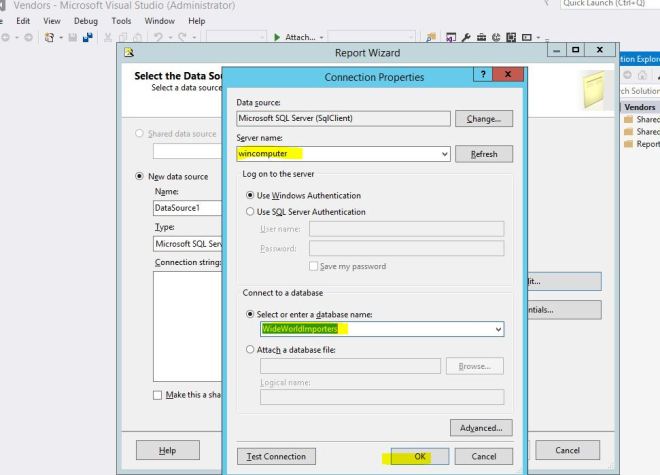
That brings us to connection properties screen. Here you need to provide the database server and database name you will be running the query on. Wincomputer and WideWorldImporters for our example below.
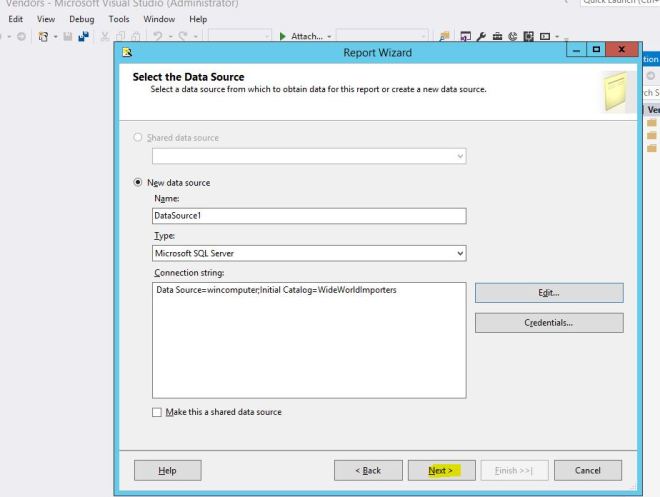
That completes the data source section, press next.
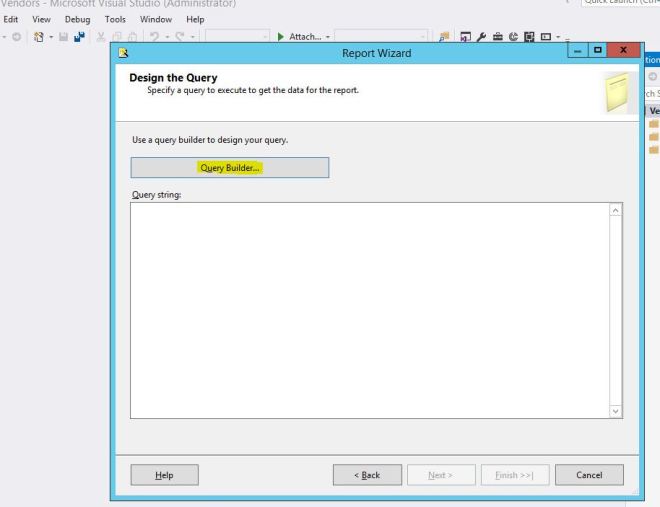
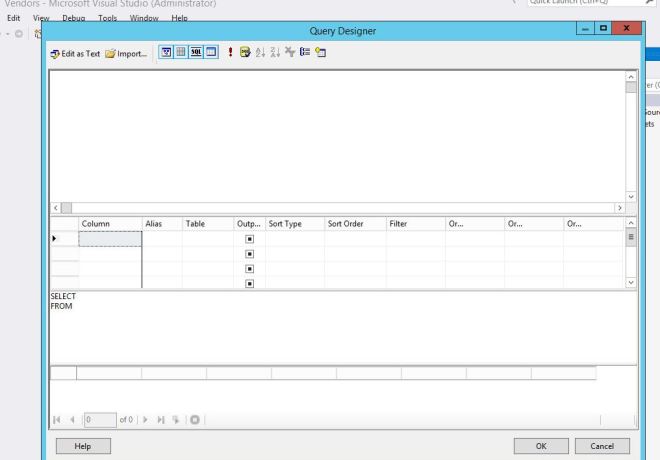
Now we want to design the query. Click Query Builder.
That brings us to the Query Designer. Since we already have a sql statement prepared, we can just copy and paste it into the section that says “Select from” below.
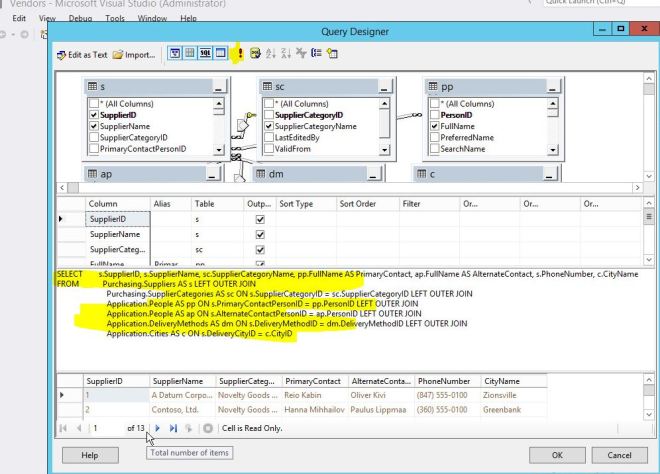
After we paste our query into the box, press the ! icon in red. After you do that all of the other boxes will fill in with the information from your query. You can add or subtract fields by selecting or unselecting them and the query will automatically update. Press OK when you are done.
This populates the design the query screen, press next.

Our report type will be tabular data, so select Tabular and press next.

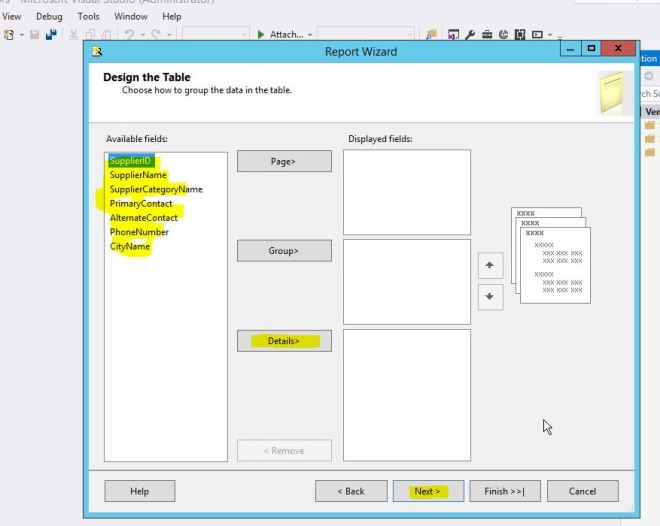
Now we want to move our fields to the Details section of this screen. Highlight them and then press the details button.
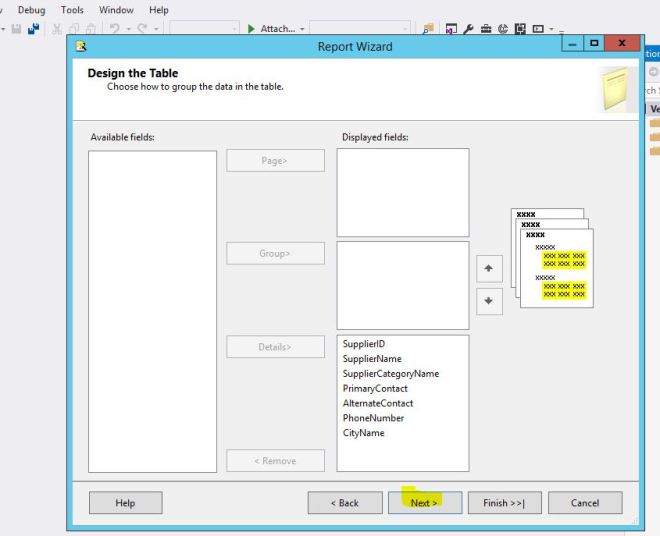
Press Next when they are copied over.
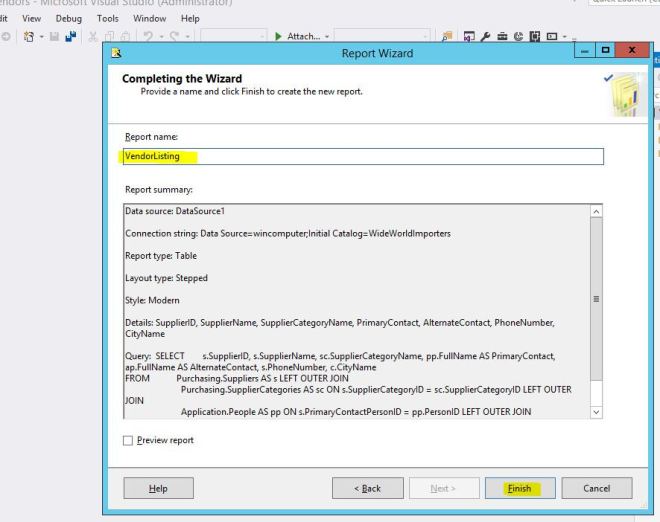
Name your report name…I selected VendorListing, then click Finish.
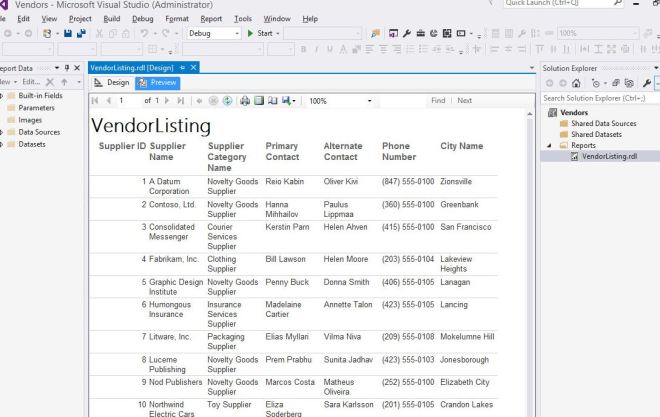
This brings us to the design tab in Visual Studio, click the Preview tab to see how the report is looking so far.

It looks ok, but there are some changes we can make to make it look more pleasing to the eyes.
We can make the columns wider, and below I am going to change the Column Titles to our corporate color. Right click in the column heading and click Text Box Properties.
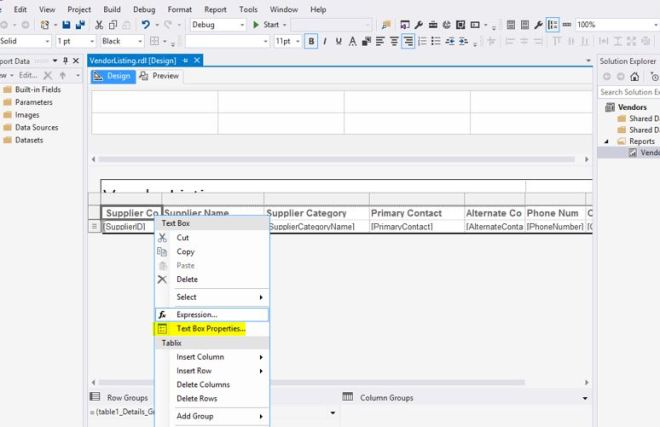
Go to the Fill tab on the left and then click the dropdown for Fill Color. Press ok when done.

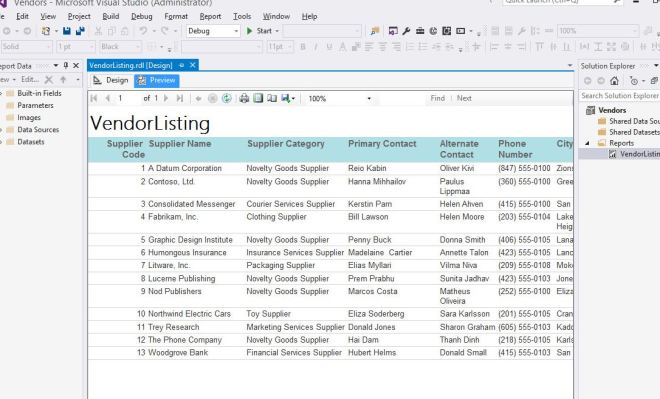
Lets preview our report again… and now it looks much better.
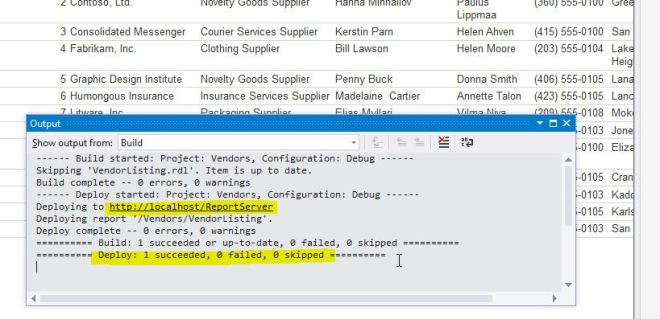
Now we can deploy our report to the Intranet so everyone can run it. In the Menu, click Build and then Deploy Vendors.

That will now deploy it to our webserver. Below it completed without any errors.
Opening up web browser and going to our Report Server, click the Vendors report.

Then click the VendorListing link. That will run our report.

Our report runs and opens up! It could still use some tweaking like making the Phone Number column wider and some other tweaks. We would go back to Visual Studio make the changes and then Deploy again.

Now you can take the Vendor.rdl file and deploy to Sharepoint or schedule the report to automatically run and email to a group of people.
We just scratched the surface on reporting, but SSRS is a very powerful system that allows you to create Enterprise worthy reports.
