
Some workplaces have multiple database platforms that you will be responsible for. The main thing a DBA is responsible for is being able to recover the database in case of a disaster. Below is an easy way how to backup an Oracle database using RMAN. Is it the only way to do this? Of course not, there a literally dozens of ways depending on how complicated your environment is, but it is a legitimate way to create a backup and it will save you. In the next posting, I will show you how to restore the database onto a new server.
The method I am going to show you would work best with a smallish database probably in the 50-100 gig range. I say that because if the database is larger, you would want to create backups to multiple disks to speed up the process and use compression and other options. Do not be afraid of the command prompt!!! There will be plenty of typing in this post, but you can copy and paste all of the commands. This may look complicated and time consuming, but not having a backup and restore plan is negligent.
Before you use RMAN, you need to make sure your database is running in archivelog mode. All production databases should be run in this mode. You can check this from Sqlplus by typing in the following command:
SQL> archive log list;

You can see above the database log mode is archive mode. The archive destination is set to e:\temp\backup.
My database is already set to archive log mode, but here are the commands to get yours in that mode.
First thing is you have to determine where you want to store your archive logs. I am saving mine in this directory: e:\temp\backup. I am not using a Flash Recovery Area.
SQL> alter system set log_archive_dest_1='location=e:\temp\backup' scope=spfile;

System altered.

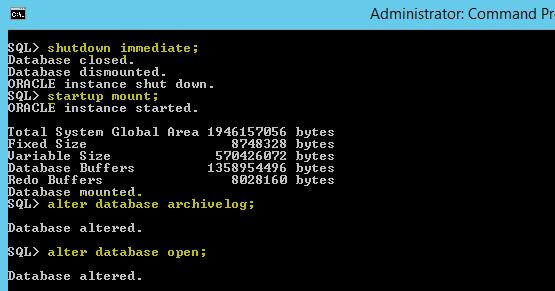
Then you need to shut down your database and enable archive log mode.
SQL> shutdown immediate;
Database closed.
Database dismounted.
ORACLE instance shut down.
SQL> startup mount;
ORACLE instance started.

Total System Global Area 1946157056 bytes
Fixed Size                  8748328 bytes
Variable Size             570426072 bytes
Database Buffers         1358954496 bytes
Redo Buffers                8028160 bytes
Database mounted.
SQL> alter database archivelog;

Database altered.

SQL> alter database open;
Database altered.
Now that the database is in a mode that we can back it up in, we need to do some RMAN configuration. This is a one time task per database that you are backing up that you specify what location the backups should go to and what file name formats the backups will be. You could skip this part, but then the backups would go into the default directories which may not have enough room and the filenames will be different.
Connecting to RMAN
From the command line, type in RMAN. At the RMAN prompt type in: connect target sys and then the SYS users password. To use RMAN you need SYSDBA rights.
C:\>rman

Recovery Manager: Release 12.2.0.1.0 - Production on Sat May 27 19:45:46 2017

Copyright (c) 1982, 2017, Oracle and/or its affiliates.  All rights reserved.

RMAN> connect target sys

target database Password:
connected to target database: ORCL (DBID=1472856847)
After you connect, to see what settings are currently active for this database type in:
RMAN> show all;

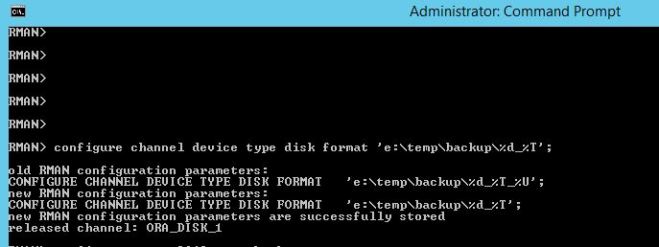
The first setting we are going to change is the directory that the backup is going to goto, and what the filename will be.
Using the %d and %T parameters, we are saying we want the Database name and the Date for the filename. For a full list of % parameters, please follow this link:
https://docs.oracle.com/cd/E11882_01/backup.112/e10643/rcmsubcl010.htm#RCMRF195
RMAN> configure channel device type disk format 'e:\temp\backup\%d_%T';

old RMAN configuration parameters:
CONFIGURE CHANNEL DEVICE TYPE DISK FORMAT   'e:\temp\backup\%d_%T_%U';
new RMAN configuration parameters:
CONFIGURE CHANNEL DEVICE TYPE DISK FORMAT   'e:\temp\backup\%d_%T';
new RMAN configuration parameters are successfully stored
released channel: ORA_DISK_1
Then we need to set autobackup of the controlfile so a backup is created whenever a database backup is created.
RMAN> configure controlfile autobackup on;

Next we configure the location and name of where we are going to keep the backup of the snapshot controlfile location where be.
RMAN> configure snapshot controlfile name to 'e:\temp\backup\snap_orcl.cf';

And finally, we need to specify a filename and location for our SPFILE and controlfile location. %F means: “Combines the DBID, day, month, year, and sequence into a unique and repeatable generated name.”, see the link above for all % parameters.
RMAN> configure controlfile autobackup format for device type disk to 'e:\temp\backup\%F';

new RMAN configuration parameters:
CONFIGURE CONTROLFILE AUTOBACKUP FORMAT FOR DEVICE TYPE DISK TO 'e:\temp\backup\%F';
new RMAN configuration parameters are successfully stored

Now we can do a Show all to see our new defaults.

Now we can finally make a backup of our database. This is the easy part, we just need to say “backup database”. That’s it!
RMAN> backup database;

If we look in our backup directory, we see that a file called ORCL_20170528 was created. We also have our snap controlfile and our spfile and controlfile backup file also in the directory. Now backup these files to another computer or some other way (for redundancy, never ONLY store your backups on the same server you are backing up), and you will have successfully created a backup of your Oracle database.

The setting up of the parameters does take some time, but once it is set, you do not need to mess with it anymore. There are some tools like Oracle’s OEM or TOAD that have a graphical interface to set these up, but typing in the commands allows you to learn what is actually occurring.
For more information about RMAN and other setup tasks you can do, please see the following link:
https://docs.oracle.com/database/121/BRADV/toc.htm
Now go protect your Oracle Database!
