
In a previous posting, we backed up your WideWorldImporters database and created a job to run transaction log backups so we can recover with no more than 30 minutes of data loss.
We will discuss the most important task of being a DBA and that is restoring your backups. A backup is worthless if you cannot bring the data back.
Below, I created a table at 4:09pm called jim_invoices from the Sales.Invoices table, to show how we can recover the data after the full backup was made.

The full backup (below) was made at 2:15pm, and the transaction logs have been backing up every half hour. After I created the table jim_invoices above, I kick off the transaction log backup job that we created in last weeks posting at 4:11pm so the data will get backed up. This means if the database got corrupt, or somebody deleted the database (?!), or if the server blows up, we can recover those changes.

Oh no, one of the DBA’s deleted the WideWorldImporters database on the production server instead of development while trying to refresh. Do not panic, we have our backups and know how to recover the data. We will have downtime, and probably an unpleasant discussion with management, but let us get the data restored.
As with everything with Sql Server, there are many ways to do restores of your data. I will show you how to do it from SSMS using the wizard. A lot of people also like to script their restores.
Restoring your backups.
Right click on Databases in object explorer and click: Restore Database.

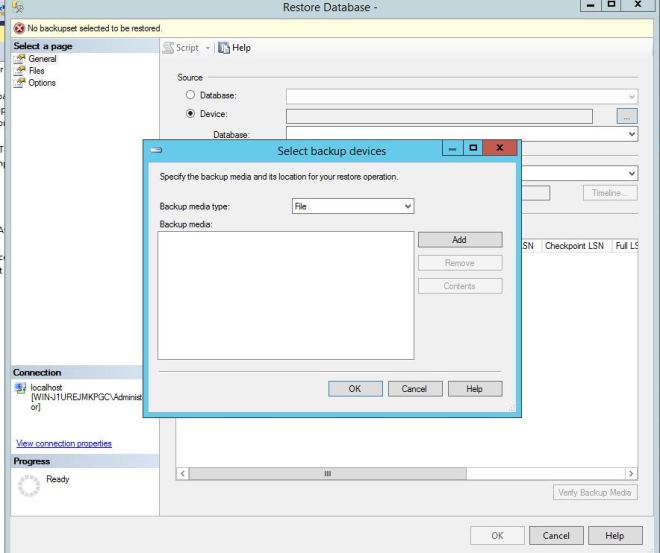
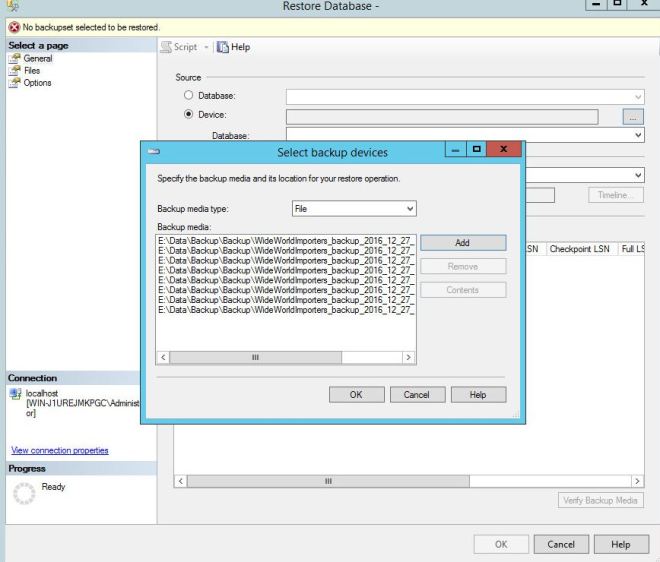
This brings up the Restore Database wizard. Our files are saved on disk, so select the Device radio button and then click the ellipses to the right. This brings up the select backup devices prompt. Click Add and navigate to the directory where your backups are stored (remember, they should be stored in multiple locations so there is no chance of losing them).
After you select the files, click OK.

Then click OK again.
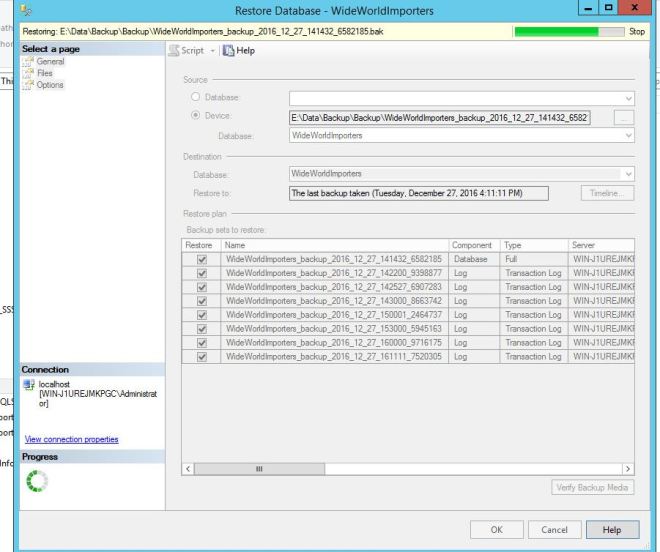
This will read through the files and show you a synopsis of the files restoring and what time it can restore to. On the General page, according to the full backup and transaction logs we provided, we can restore to 4:11pm which was the last log we had a backup of.

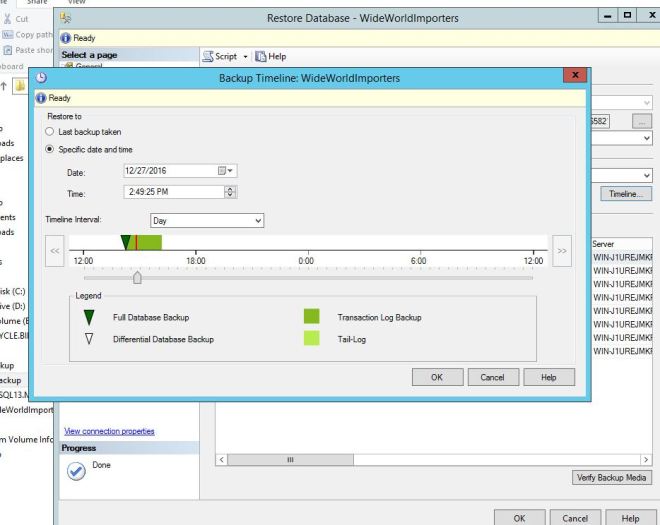
If you click on the Timeline button, you can play with the slide bar and restore to different times since we have all of the transaction logs since the full backup. However, we are going to restore to 4:11pm.
On the Files page, this allows you to change the directory you want to restore to. You do this if the original drive no longer exists, or if you are restoring to another server that does not have the same drive structure or if you just want to restore to a new location.

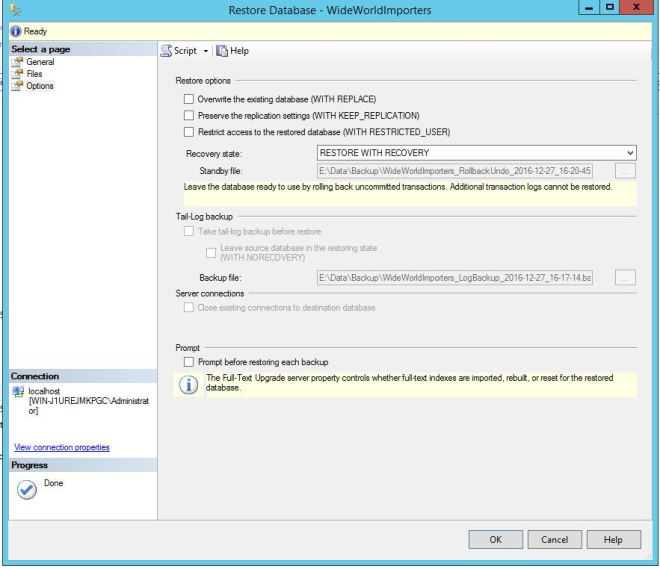
The Options page has many items that can be used, and rather than explain them all in this posting, I will point you to Books Online https://msdn.microsoft.com/en-us/library/ms188223.aspx. Every restore scenario has different requirements, but for ours that we are doing, the recovery state should be: RESTORE WITH RECOVERY.
This will use all of the transaction logs that we provided and will not allow any others to be applied. This will then open the database.
Click ok when you are happy with your selections and the recovery process will start.
Depending on how big your database is and how many transaction logs you are restoring, you will eventually get the database restored successfully message.

If we query the database, we can see the jim_invoices table has been restored and the database has been restored to 4:11pm

You have just restored your database and the business can now continue to operate.
Restoring your backups should be done as often as you can onto test servers or in development. This keeps your skills sharp and you will have confidence when you need to perform this critical task under the gun and most importantly, it validates that your backups actually work.

One thought on “Restoring your Sql Server Database”